
 The South African
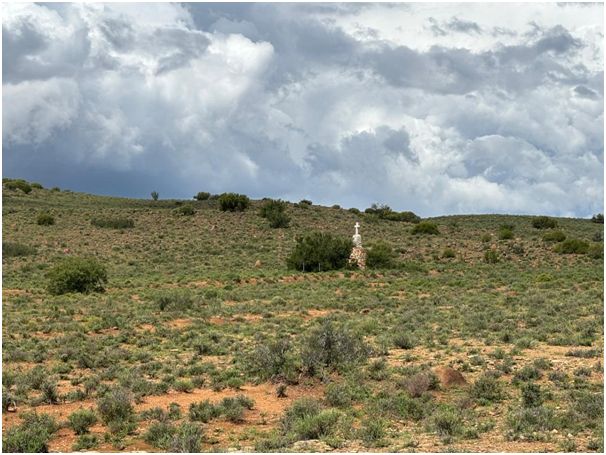
Suffolk Hill
(photograph courtesy Charmaine Rous)
Introduction
In the early part of the Second Anglo-Boer War the attitude of the British was that the war with the Boers was trivial, and simply another colonial upset by a (to the British) primitive enemy, and they would be home before Christmas. This put the British soldier at a distinct disadvantage when he was to discover that not only was the Boer opponent better armed, but that he was also better trained in a style of fighting that suited the terrain. It was in light of the disproportionate skill of the Boers that the 1st Suffolk Regiment would make tactical choices in their efforts to take Grassy Hill (later Suffolk Hill) in the dark.
Action that took place in the northern part of the Cape Colony, did not attract as much attention, both at the time and in coverage by historians later, as those in places like Natal and the Boer Republics. The battles in the northern part of the Cape Colony in early 1900 were more scattered, and did not draw in as many men, so may have seemed less impressive than those elsewhere. Further the Battle of Suffolk Hill took place hot on the heels of the crushing defeat of “Black Week” but was also eclipsed by the more dramatic Battle of Wagon Hill, near Ladysmith in Natal, having taken place on the same day (6 January 1900) and which received a great deal of attention in the British press as efforts to relieve the siege at Ladysmith were made.
A flurry of books followed hot on the heels of the conclusion of the war in 1902, and while valuable resources they did not have the advantage of a period of analysis, nor access to later documents such as testimony to the Elgin Commission. We have consulted several original archival records, accounts and letters to bring you an analysis of the Battle of Suffolk Hill and placed it in the context of time and place.
The importance of Colesberg
The area around Colesberg was critical to the British for maintaining an open railway line past the junctions at Arundel and Noupoort (sometimes Naauwpoort) ensuring that troops could be moved quickly into the interior, along with their provisions. Noupoort connected the Cape railway lines to Johannesburg and Pretoria via Bloemfontein, while Arundel connected the Port Elizabeth line. Having these junctions protected meant that ports at East London and Port Elizabeth could be utilised over and above that at Cape Town, and thus allowed for efficiency with respect to bringing in men, horses and supplies, and decreased the distance and time these had to travel, with East London and Port Elizabeth being considerably closer to where the war was being fought. In the early part of the war the British army relied heavily on infantry, even though they were unsuited to the Boer tactics and the harsh terrain, but still a stream of infantry would arrive to reinforce those already in the Cape Colony. Mounted troops would fare better, particularly once bolstered by the colonial units. Forces involved in the Battle of Suffolk Hill
1st Suffolk Regiment
The Suffolk Regiment formed in 1685 for the purpose of suppressing the Monmouth Rebellion. Henry Howard, 7th Duke of Norfolk, was ordered by the sovereign at the time, King James II to do so. They were active in a number of wars and battles, including the Napoleonic Wars.(1)
The men of the 1st Suffolk regiment at the time of the Battle of Suffolk Hill were regular soldiers in the British Army. The British class system was alive and well in the way the army organised itself with the officers (both commissioned and non-commissioned) largely from middle to upper classes, and the rank and file comprised mainly of working-class men.
The economic situation in Victorian England generally in 1899 was dire, with working class people largely impoverished to the extent that serving in the army may have seemed attractive and at least offered prospects.
In considering the difference between a British soldier and a Boer fighter, an extract from a letter written by Mr A Forbes Grant, who was a schoolteacher in Cradock, to an unnamed newspaper, sums up the differences relatively well. He wrote:
It would come as a shock to many a “Tommie” that the limited training in shooting, drilling and marching would render him quite unprepared for a war where, despite representing the mighty British Empire, he would not be ready to face an enemy who had no regard for conventional warfare as the British had experienced it in Europe, and that the Boers were a far more dangerous and better-armed enemy than those they had faced in their colonial wars.
The Heilbron Commandoi
The men of the Heilbron Commando came from the town of Heilbron, in the northern part of the Orange Free State. By and large the peace-time training of commandos was usually in the field during conflicts with local tribes and maintaining law and order where necessary. The Heilbron commando in Colesberg during the Second Anglo-Boer War fell under the overall command of General Hendrik Schoeman of the ZAR (Zuid-Afrikaansche Republiek).
The Heilbron men at the Battle of Suffolk Hill were led by Commandant Stefanus “Rooi Frans” van Vuuren, supported by field cornets PJG Theron and Johannes Viljoen.(3)
ZARPs
The ZARPs (Zuid-Afrikaansche Republiek Politie (South African Republic Police)) comprised mounted and foot police in the ZAR. Prior to the Second-Anglo Boer War they formed part of the Artillery.(4) One of the areas where the ZARPs kept order was in the mining areas of Johannesburg and they were very much disliked by the “Uitlanders” who worked in these areas and considered the ZARPs to be heavy handed in their policing.(5)
The ZARPs were a well-trained paramilitary force, and it was a relatively easy transition, even for the foot police, to take up the role of mounted infantry and serve with the Boer commandos during the war. Commandant Gerard Marie Jean van Dam had left Johannesburg with 600 Johannesburg Police for the Natal front with a further 100 following from Pretoria.(6) In Colesberg the ZARPs under Commandant van Dam numbered around 200 men.
British propaganda and press leading up to the breakout of war
It is important to understand the attitude and expectations of the Suffolk men prior to their arrival in South Africa. With increased literacy in Britain,ii the public began to eagerly read of the goings on in Britain’s overseas wars. In the runup to the Second Anglo-Boer War, in 1898, the public was captivated by reporting on events in Sudan, but this would soon change to reporting of tension in the ZAR reaching a crisis point. It is not possible to consider the events leading up to the outbreak of the war without seeing the huge effect Alfred Milner, in his position as Governor of the Cape Colony and High Commissioner for Southern Africa, would have on the narrative that would be presented by the British press. While the official policy of the British government was to not provoke a war, Milner continued to foment trouble.
It is likely that the Suffolk soldiers would have read about the complaints of the Uitlanders in the press, and have felt that theirs was a noble quest to free their countrymen from the yoke of oppression suffered under, as they would present it, the stubborn and jingoistic ZAR government who did not concede to sufficient reform, nor support fundamental access to democratic rights for Uitlanders in the country they lived in. The Boers were seen as the aggressors having declared war on 11 October 1899, with little focus on the events preceding this, or the fact that Britain’s actions were pushing for a war. Only “facts” favouring the British propaganda machine were dominant.
In an article about the interaction between the British press and its public in the late Victorian period, Dr Jacqueline Beaumont Hughes stated:
The opinion the British soldier may have formed about the Boers they would face in battle would have been fairly narrow, with the Boers painted as backward and primitive not only by the press, but the British military.
Intelligence
Prior to the outbreak of the Second Anglo-Boer War in 1899 there was a budding intelligence function within the British military structures, but it was largely treated with some condescension and seen by high-ranking officers as a “professional backwater, suitable only for those officers deemed unfit for command.”(9) Despite this, and the challenges of severe underfunding, the Military Intelligence Division, or Field Intelligence Department in the South African geographical context, prepared a guide titled “Military notes on the Dutch Republics of South Africa” which provided a fair amount of intelligence, but this was often ignored as a number of officers did not consider the Boers as their equal in any respect, particularly militarily, despite experiences in the First Anglo-Boer War and useful intelligence, such as the mass purchase of better weapons by the Boer Republics in 1898 and 1899, prior to the declaration of war.(10,11)
British strategic focus
Given that the British military disregarded much of the intelligence they received they underestimated the Boers, both in their military capability and the fact that the Free Staters would assert themselves with vigorous determination. They had correctly surmised that the Boers would place considerable emphasis on Natal. They did not believe the Boers would invade British territory, such as the Cape Colony, or if they did they would not go very far.(12) This was true in that General Hendrik Schoeman, a Transvaaler in command of the Free State’s southern border, was slow to make his incursion into the Cape Colony, and did not consolidate his position once he had done so, particularly when numbers and tactical ability were stacked in his favour.
Upon his arrival in Cape Town on the evening of 30 October 1899 on the vessel Dunnottar Castle, General Redvers Buller, commander of the British forces in South Africa, hastily moved forces to Natal. He was familiar with what the Boers could do and did not share the views of his countrymen that the Boers would be quite so easy to beat. He also understood how the vast and difficult terrain added to the task before him(13). Buller had served in the Ninth Frontier War (1873–1879), the Anglo-Zulu War (1879) and the First Anglo-Boer War (1880–1881) - sometimes referred to as the Transvaal Rebellion, perhaps to downplay the drubbing the British had received.
By time of Buller’s arrival, Louis Botha, with various commandos, had made an unexpected and aggressive sweep into Natal early on. The British were already involved in early battles and skirmishes: Battle of Talana (20 October 1899), the Battle of Elandslaagte (21 October 1899) between Dundee and Ladysmith, the Battle of Rietfontein (23 October 1899) near Ladysmith, and the Battle of Ladysmith /Nicholson’s Nek (30 October 1899). What victories the British achieved were Pyrrhic. Added to this, things were not going especially well on the western front either, with Mafeking (today Mahikeng) besieged by Koos de la Rey’s forces by 13 October. There was a genuine concern that the Boers would continue to move south from both flanks putting the British under severe pressure. The biggest concentration of Boer forces was in Natal. Ladysmith would be besieged before Buller’s arrival in this dramatic theatre of war, and events in Natal would capture the British imagination and dominate their press.
With Natal consuming Buller’s attention, the Northern Cape was left underdefended, and he could not adequately command his entire force while tied up on the ground in Natal. Added to this, decisions prior to the war focused on putting boots on the ground, but they did not carefully consider the type of unit that would be most effective, defaulting to infantry which had served them well in European wars, rather than using mounted infantry and cavalry right from the start. Large numbers of infantry were sent, thinking they would steamroll the Boers, but infantry is no match for highly mobile mounted men who had better rifle skills and whose tactics were well suited to the terrain, and honed over generations.(14)
The Suffolks sail to South Africa
The Suffolk Men would likely have been sent off by enthusiastic crowds who wished them well and showed their gratitude for keeping the British flag flying high. They might have felt confident and buoyed by a sense of national pride. To many working-classmen, it may have been a new experience to be acknowledged and appreciated, and to be a part of something they saw as greater than themselves.(15)
The Suffolk regiment departed via Southampton on board the SS Scot on 11 November 1899,(16) stopping in at Madeira at 19:00 on 14 November, and continuing her journey at midnight,(17) docking in Cape Town on 28 November 1899.(18)
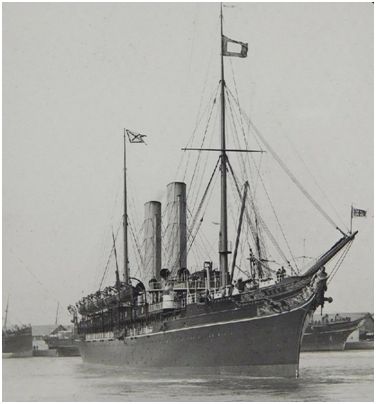
SS Scot steaming its way out of
Southampton en route to Cape Town
(Source: https://www.bandcstaffregister.com/page1956.html )
Private H Potter wrote about his journey and arrival in South Africa in a letter to his previous employer, Mr Petit who was a coach builder in Bury St Edmonds. An extract from the letter reads as follows:
I was not much struck by Cape Town what little I did see of it from our ship whilst in harbour, as it was our only chance for as soon as we landed we were served with 100 rounds of ammunition, packed into a train which was waiting quite close to the quay, and away to the front.
It seemed so sudden we could hardly believe it. We soon lost sight of Cape Town, and we were all wondering where we were going to, but still we kept passing station after station till night came on, but still we kept running on. We all fell asleep at last and the next morning when we awoke we were still going. We found out where we were going when we reached De Aar Station (about 700 miles from Cape Town). We were for Naauwport and we reached there early next morning after being nearly 50 hours on the train.
I could not help noticing the Cape Colony was a desolate place, there being scarcely any inhabitants whatsoever.
In William Blake’s famous hymn, Jerusalem, he writes of “England’s green and pleasant land”. How the experience of these young men’s home in England would contrast with the vast, dry, and unforgiving expanse of the Cape interior they found themselves in, and at the height of summer.
Private Potter’s letter continues:
We are in General French’s column. He went out from here and engaged the enemy about 6 miles from here and drove them back. He did not take our regiment with him in case the Boers rushed in while he was out.
There were 3 or 4 killed on our side but I do not know the enemy losses.
We expect to make the general advance on the 28th December [1899], the enemy has taken up a strong position at Colesburg [sic] about 18 miles from here, and I expect I’ll be in the thick of it before you get this letter.
We’ve had several severe sand and thunderstorms here. It is fearfully hot, it will not be much like Christmas.(19)
Tactical differences between British and Boer forces
Looking at some tactical differences between the opposing forces, and might help to explain the British choice of a night attack on the Boers.
By and large the Boer forces did not change very much from how they had organised and fought in the First Anglo-Boer War from 1880–1881. The main difference is that in the first war the Boers were protecting their border and did not generally make incursions into British territory. Despite it being somewhat less complicated, battles like Majuba (27 February 1881) no doubt showed the British that the Boer tactics were unconventional.
The Boer skills would have remained honed between the two wars, and young men acquired the necessary skill, as even though there were fewer hunting opportunities and people began to urbanise. The Boer Republics held regular shooting competitions to keep skills sharp with prize money and access to free ammunition offered to encourage participation.(21)
Tactically the Boer forces preferred to hold a defensive position and conceal themselves, making use of sniping to pick off the enemy.
The smokeless ammunition used by the Boers caused much confusion to the British. The Boers would be in well concealed positions, so even with bullets firing it was not obvious exactly where the shots were coming from.
The Boer sharpshooters’ continual, and effective, sniping may have led the British to believe that a night raid where the Boers did not have the advantage of catching sight of the British from a long distance would even the odds somewhat and improve morale.
Events leading to the battle
On 14 November 1899 General Schoeman’s forces had made an incursion into the Cape Colony and occupied Colesberg unopposed. Despite this aggressive, albeit somewhat late, move, Schoeman’s overall indecision and perceived passivity was a huge frustration for the men under his command, and the Boers failed to gain ground while they were in the strategically useful position of being numerically superior. General French on the British side was sure to keep the Boer forces engaged enough to make it seem that he had more men at his disposal than he actually did in the hope that this would prevent the Boer forces from attempting to take Noupoort and Arundel, where thy might well have succeeded in taking the important railway junctions. Besides the lack of men under General French, himself a cavalryman, the men he did have were not the cream of the military, and it was no small feat to constantly engage the Boers with men, many of whom could not stay on a horse at a trot, never mind care for the horses properly.(23)
In late December 1899 General French received reinforcements which generously bolstered his number. He got right back into the thick of things from 1 January 1900. The opening days of the year were disappointing with wins and losses on both sides, but no clear winner overall.
On 4 January 1900 General French received further reinforcements in the form of 1 500 men, and this gave him the confidence to return to offensive tactics. The Boers held a number of strategic hills that stymied British attempts to push them back into the Free State. The critical points of the Colesberg Road bridge, and Norval’s Pont were frustratingly out of reach.
The Battle of Suffolk Hill
On 5 January Grassy Hill was carefully reconnoitred and the hill shelled by the British, standard procedure for a suspected enemy position. Upon completion of this activity, French returned to his headquarters and issued orders for an attack on Saturday 6 January 1900. The commanding officer of the 1st Suffolk Regiment, Lieutenant-Colonel (Lt-Col) Arthur John Watson,(24) had held the belief for some time that he could capture Grassy Hill with his battalion. Added to this the number of troops under his command had increased by a half battalion. Watson requested Lieutenant-Colonel FJW Eustace to petition General French on his behalf for leave to carry out a night attack on Grassy Hill, which was duly granted at 20:00 on the evening of 5 January 1900. Watson was instructed to inform the general, and troops in the vicinity, of his plans, but no further communication followed from Watson to his superiors.(25)
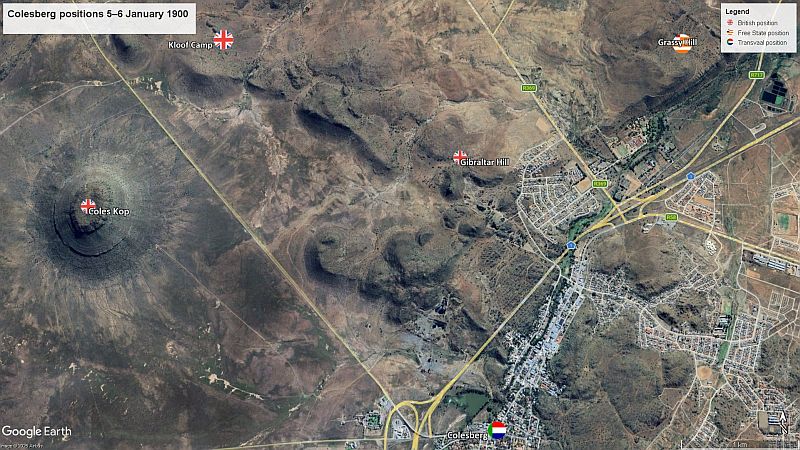
Some positions around Colesberg
from 5-6 January 1900 superimposed
on a modern map (using Google Earth Pro)
The choice of a night attack is unsurprising given the circumstances. The British were ill-prepared for the Boers’ continuous harrying of them with sniper fire. While many British accounts speak of the mythical level of eyesight the Boers had, and it may well have seemed that way, in reality, they only needed a handful of sharpshooters armed with excellent rifles to cause considerable damage. One of the grave weaknesses of the British attacks were that they marched the infantry in formation attempting a full-frontal assault, and it was deemed dishonourable to break the line and find cover when under attack. A few accurate shooters aiming at a closely formed column was not a great challenge, and the British men were not equipped with the same level of marksmanship which could allow engagement from a greater distance.
From this point we will use statements made by men of the Suffolk Regiments, found in the Suffolk Regimental Archive to explain the events. Along with the British accounts, a letter of the Boer experience was found in the same archive. It was written by PA du P Naude on 2 November 1913 and sent from Heilbron to Colonel George Montagu in 1913.(26) It makes reference to a letter from Montagu on 13 September 1913 and questions that he had asked. While the accounts of the Suffolk men were written fairly soon after the battle, and an account thirteen years on would be less reliable, it does provide valuable potential data. Naude relates information shared by PJG Theron, at that time an MP for Heilbron in the Union House of Assembly.(27) During the Second Anglo-Boer War he was a field cornet in the Heilbron Commando, as mentioned earlier.
According to a report by James Garner,(28) which was undated, four companies of the 1st Suffolks were ordered, on the evening of 5 January, to parade at 04:30 on Saturday 6 January 1900. The plan was not executed as communicated.
According to Lieutenant (Lt) Allen at 23:30 on the evening of Friday 5 January a visit was received from the Adjutant informing the officers to have men ready to fall in in half an hour, wear canvas shoes and that each man was to be equipped with 50 extra rounds of ammunition per man.(29) The operation was explained stating that the men were to take the koppie known as “Grassy Hill” and hold it to daybreak when the artillery would be their reinforcements and proceed with shelling Colesberg.(30) Minimal resistance was expected from the Boers. The men were advised to do what was needed with their bayonets and not fire shots. They were told to keep up the fine traditions of the old regiments, particularly in light of them having celebrated the century of Gibralter in the last year.
The men were woken at midnight, and four companies (being H, D, A and B(31)) totalling 354 men(32)) were ordered to put on canvas shoes (slippers) to ensure they made no noise, enabling a surprise attack to be made on the Boers.
A statement by Captain Brett states that the men paraded and then marched out of Kloof Camp at 00:46 on 6 January 1900,(33) and moved due east toward Grassy Hill. An anonymous letter by a soldier to the Daily Mail (undated) gives a slightly earlier time, namely 00:30, but the times are acceptably close.(34)
Lieutenant Allen’s statement also gives the time of the men marching from Kloof Camp at 00:30.(35)The companies marched by company in alphabetical order, with A company under the command of Captain Brett, and Lieutenant Carey. B company was led by Captain Thomson, D company was led by Major Graham and Lieutenants Allen and Wood-Martin. H company was under the command of Captain Brown and Lieutenant White.(36)
The men marched and were halted by the commanding officer at 01:30. A discussion followed to ensure all were au fait with the exact plan.(37) Colonel Watson had done quick reconnaissance to ensure the hill was clear and, on his return, instructed the men to advance without making any noise.(38)
H Company were ordered to the front when the companies were halted at the foot of Grassy Hill. The men were again reminded to only use their bayonet.(39) At the foot of the hill the men would have clambered over the rockface that was stepped upward. According to Captain Brett, as they ascended and gathered on the main approach where the men were formed into quarter columns with the files extended to three paces. Between 01:45 and 02:00 the men were off again. H company led the way scaling the koppie with D company in support, and B and A companies in reserve.
Brett noted that it was so dark that the men could not see more than fifteen paces to either side. He believed it was the intention of the commanding officer to begin to move to the flanks with the positions determined beforehand.(40)
To understand how light or dark it was we should assess the conditions at the time. The moon phase was waning gibbous on 6 January 1900. When the men left Kloof camp the moon would have been rising low on the horizon in the east-northeast, its ascent starting at 00:04.(41) Watson’s eagerness to march on Grassy Hill may have had much to do with the conditions being optimal. On leaving Kloof Camp there would have been enough moonlight for the men to see over the roughly 3.5-kilometre march, with deep shadows cast westwards by the moon which would allow for tactical pauses if needed. A further advantage was that without the moon full, the Boers would have had a more difficult time spotting the oncoming columns. Around the time the men had halted on Grassy Hill the moon would still have been low in the sky and the crest of the hill may have obscured the moon, thus causing the southwestern part of Grassy Hill to be in complete darkness.
In the Anonymous soldier’s letter he states:
According to a letter written by Private J Ruffles, “A lot of whistling, like a bird, took place, but no notice was taken of that.” In Naude’s letter, clearly an answer to whether the Boers had used calls or signals, it was said that they had not. It wasn’t unknown for the Boers to make bird sounds to communicate, but there were also birds who may have been disturbed by the men, such as nightjars, and they can put up quite a racket.
In the Anonymous soldier’s letter, he states that at the foot of the hill the column encountered a deep ditchiv and halted before commencing the climb.
It was believed that a single shot was fired by the Boers. According to a letter by Private Cockle he stated, “… our scouts passed the Boer sentry who fired a signal. We had orders to lay flat on our faces to the ground, the bullets showered on us like a hailstorm.” As the men had continued to advance, they quite suddenly faced a fusillade of fire.
The change of guard had occurred at 02:00, the guard being relieved having not yet left his post. The account states that the first knowledge the Boers had of an imminent attack was at 02:15 when the relieved guard breathlessly announced to the officers in charge that the “… grating of a boot heel of the advancing party over a boulder …” had been heard. While the Suffolks were not wearing boots, on the stoney ground, it could just as easily been two rocks grating against each other. According to Naude “While this point – the correctness or otherwise – was still being debated by the men, a footfall was distinctly heard in the same direction, and almost immediately rifles flashed and the attack had commenced.”(42)
As companies D, B and A followed H company and were ascending the koppie, around halfway up the support companies were halted again.(43) Lt-Col Watson and the adjutant proceeded to the top with H company. No sooner had they ascended the crest than they found themselves under a storm of rifle fire. H company charged unsuccessfully and then made a second with half of D company, but it was futile. The Adjutant and Lieutenant White were shot, and Captain Brown mortally wounded. Major Graham too was mortally wounded.
The command “Retire!” came for those halfway up the kopje, assumed to have been given by Lt-Col Watson. For the sake of clarity it must be stated that prior to the operation being carried out, Lt-Col Watson has arranged with the men that when he, as commanding officer, gave the order to retire the men were meant to return to the foot of the hill to regroup and return to the original plan.(44)
When the order came the intention was long forgotten, and many men fully retired from the battle, but it caused further confusion, and again the darkness is mentioned, which did not help with the Suffolks running into the bayonets of their fellows.(45) A rally position was formed by Captain Thomson a fair distance to the rear of the kopje, out of range of the Boer rifles. A company was ordered to make a dash for the apex of the kopje, but not only were these ineffectual, and further loss of officers suffered: Lieutenant Cary was killed, and Capt Brett and Lt Butler wounded.
Captain Brett writes:
The C.O. [commanding officer] ordered me to take the crest of the hill with the few men I had, and in doing so I got hit just at the top. Carey and Butler being close by, each of them hit too. I became unconscious. Thompson, meanwhile, had gone to my right, and was coming up under a very heavy fire, over very rough ground. The Colonel was on that side, and in coming towards me was killed. When I came to myself, I found no end of men killed and wounded round me, and none of our others in sight, and bullets coming at us pretty fast.(46)
Continuing with the heavy fire on the Suffolks, Corporal Watts writes:
Captain Thomson was ordered to round up all men with him. Lt-Col Watson led this charge, but halted the men under heavy fire. The trouble was that it was not clear whether the fire they were under was caused by the Boers, or by their own A company firing on them in error. At this point the light was still low and they could not see clearly. Feeling satisfied that the fire, or majority thereof was from the Boers, Watson once again ordered the advance, and the men charged. According to Lt Allen, when Lt-Col Watson had progressed about 46 metres (40 yards) an enemy bullet fatally wounded him, and he is said to have dropped immediately. Lt Allen speaks about himself being knocked down too.(48)
Practically all the officers had been wounded or killed. This was a devastating blow as there was nobody restore order and discipline and focus the men who remained. It simply increased the chaos. For about 45 minutes the Suffolks kept up sustained fire at the Boers, but it did not having the desired effect.
That the artillery fired on their own men was vehemently denied by the British military, but the statement by Captain Brett strongly suggests that it was in fact the case:
The artillery was in the hands of the 1st Essex, firing their 15-pounder field guns from their position on Coles Kop, the commanding height giving them excellent views in all directions generally, but at this early hour the visual would have been poor.
Capt Brett goes on to relate:
I crawled back to see if I could get some light on the situation: I got about 15 paces back when I found poor Brown so badly hit that he could not help me with my suggestion. I got Sergt Claridge to try and collect some men, to get away, as to advance was impossible. He was not very successful in this, and was taken prisoner with us. Some of the men were not inclined to leave the wounded, and one man put up a white flag, which I ordered down.
The Boers were closing round us and shouted to us to surrender, and after some little time, I agreed to do so. The rest of the half wing had got away under cover of our fire, and I did not know there were more than 30 wounded and unwounded with me, and as we could neither advance, retire, or stay where we were without losing lives for no purpose, I considered I was justified in surrendering.(49)
As astronomical twilight gave way to nautical twilight the 1st Suffolk Regiment surrendered between 05:30 and 06:00 on the morning of 6 January 1900. The visual conditions would have vastly improved by this time and the full horror became visible. The light revealed that all along the Boers fought from a well-concealed trench at the top of the koppie, and had suffered fewer losses, with even the artillery failing to cause them any major problems.(50) Trenches would suit the flat trajectory of the Mauser rifles the Boers favoured, and even in the dark their sustained, heavy and sweeping fire would have been devastating for the British.
By the end of battle the remaining Suffolks were surrounded by Boers and ordered to put their hands up. They were instructed to leave their rifles and come to the front. The battle was over.(51)
Details of the death of Lt-Col Watson
According to the Naude letter sent to Col Montagu, Lt-Col Watson had been shot by field cornet PJG Theron. It was stated in the letter that Watson was a fairly accurate shot, having killed about half a dozen Boers, and subsequently grazing the brim of Theron’s hat. Theron was quite aware of the direction from which the bullet came, and he watched as Watson concealed himself behind a rock, and as soon Watson placed his rifle into position stabilising it on a boulder and his head appeared to take a shot, he was beaten by Theron who shot first, his accurate head shot finding its mark and Watson fell forward over the boulder. This occurred over a distance of about 23 metres (25 yards).(52)
Had there been spies?
It is clear that in his correspondence Montagu had asked if the Boers had a spy informing them of the events ahead of time. Naude stated that while the Boers are known to use lamps to flash signals and use bird calls to communication they had not done so that evening.
As for spies, Naude reminded Montague that the Suffolks’ every movement had been watched, particularly the scouting. He stated that it not been especially difficult to conclude that given the movements on 5 January 1900 an attack was imminent, expected that night in fact. The officers thus ensured their men were in a state of readiness.
Naude clearly states that no information was received from the British lines, in any shape or form.(53)
How many Boers were on the Grassy Hill that morning?
With the confusion that morning, it is no wonder that to the British the Boer forces must have seemed far more numerous than they were. The situation can be surmised from a letter by Corporal Charles Watts who wrote from Arundel on 11 January 1900 to his father:
In his letter home Private J Ruffles also states his belief that the British were massively outnumbered by Boers, saying, “There were about 330 of our regiment went to take a hill with 3 or 4 thousand Boers on it.”(55)
The matter of the number of men on the hill that morning was also broached by Montagu, as is evident from Naude’s reply:
Commandant van Dam’s report differs from Naude’s on the numbers. Van Dam reported that he hastily gathered 50 men (not 15), at which point they galloped to Grassy Hill (which would have been southwest of his initial position) and herded Boers who were withdrawing down the ridge back into the fight. He confirmed that 200 men held Grassy Hill. The ZARPS crested the hill at the same time as the Suffolks and sent a heavy volley of fire at them. It was much too close for them to possibly miss. It is at this point that 15 men mounted their horses in haste, without saddles or bridles, and attack the Suffolks on the flank. As the Suffolks retreated the ZARPs were in hot pursuit. According to Van Dam the Suffolks surrendered within fifteen minutes of his arrival.(57)
Were dum dum (expanding) bullets used?
A letter by the anonymous soldier to the Daily Mail makes a serious allegation:
There is no way to definitively answer the question of whether explosive bullets were used. At this early stage I would think it unlikely. If a soldier is inexperienced in warfare, and has little battlefield experience, the horror of what a normal Mauser round can do may have come as a shock.
Accusations and retractions
The Battle of Suffolk Hill was the only reverse that General French had received at the hands of the Boers so far. Intense arguments followed to determine who was to blame for the events on that fatal morning of 6 January 1900. In a dispatch by General French shortly after the events on the morning of 6 January 1900, he attributed the failure of the attack on Grassy Hill to panic among the Suffolk men. There were claims that the Boers had cried out the issue to retire, although the statements by the officers show this was not the case, it was Watson and his officers. In French’s dispatch he claimed that the Suffolk men had retired before being ordered to do so. The matter was of a very serious nature and a Court of Enquiry was held to determine the facts.
The honour of the Suffolks was restored after the enquiry, as it was proved that the Suffolk men had not behaved in a manner that would lead them to disrepute. They were honourable and had followed their orders. General French retracted his accusation, which had been an unjustifiable slur on the Suffolks’ good name.
Prisoners of War
According to Capt. Brett the Suffolks had four officers and 27 NCOs (non-commissioned officers) wounded, and of those wounded one officer, Capt. Brown, and five privates died of their wounds at Colesberg. Of the men who surrendered and were taken as prisoners of war after the battle, six were officers, and 101 were NCOs and other men of the Suffolk Regiment. The men were sent to a prisoner of war camps in Pretoria. The officers to the more comfortable State Model School, and the non-officers to the somewhat makeshift Waterfall camp.(58)
Of his experience as a Boer prisoner of war, Capt. Brett wrote:
We have a regular mess supplementing our rations with food ordered from the town. If we are kept penned up in this place much longer, some of us will go mad I think, Capel-Cure has already done so, or something like it, and has had to be sent home.(59)
The 1st Suffolk men who returned to camp were relieved by the 1st Essex Regiment given that the Suffolks had no officers. They were sent to Port Elizabeth to await officers.
Conclusion
The early part of the war was one of much excitement for many young men who did their duty in a far-flung land. They were unprepared for the climate, terrain, and how little they knew of the enemy. Many young men were proverbial lambs to the slaughter.
We have to look at this even through the eyes of Lt-Col Watson and his sure belief that the could take the strategically important hill, with conditions perfect for doing so, and also thus avoid engaging the Boers during the day, and their endless sniping.
In these matters, if looking for where to lay blame, it is not clear cut. Watson’s overconfidence may not have been the greatest obstacle, but even before that, the way the British handled the early part of the war put them at a distinct disadvantage against an enemy they did not expect to be as good as they were. The British would take some time to get their men to the same level, and it would also need a complete overhaul of how the British military arranged itself. The British men who died were not just killed by a superior enemy, they were killed by a British system that did not see the need for reform, and suffered from a hubris that made them blind to their faults and weaknesses.
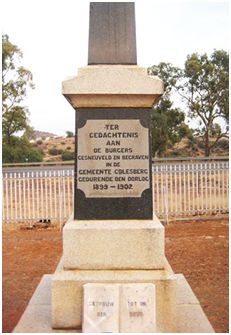
Memorial in Colesberg to Boer congregants
who died in the Anglo-Boer War 1899-1902
Footnotes
i Heilbron was primarily agricultural and is within an area known as Riemland, with riem referring to strips of leather taken from hunted animals (or cattle) and used to make practical items like rope, but were also popular when worked into chairs to form the seat. Heilbron is in a relatively flat and peaceful part of the Free State.
ii The Forster Education Act of 1870 (also Elementary Education Act of 1870) provided a framework for the compulsory education of children at elementary level, thus of ages 5 to 11, in England and Wales. The effect was to create a more literate public, and by 1899 Britain had an eager reading public.
iii The date conflicts with the official shipping records, but it is a small detail.
iv The “ditch” referred to is a non-perennial river that fills when there is heavy rain, but is mostly dry. It would certainly present an obstacle in the dark.
Name Rolls for the British and Boer Forces
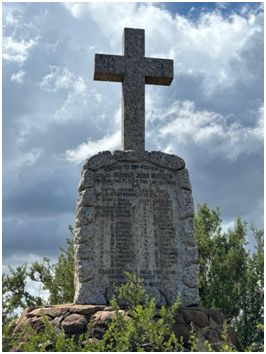
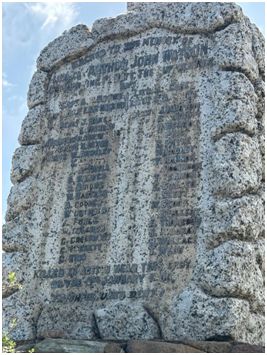
Memorial to the men who died on
Suffolk Hill 6 January 1900
(photograph courtesy Charmaine Rous)
1st Suffolk Regiment
The following list is taken from the information regarding the 1st Battalion of the Suffolk Regiment on 6 January 1900 from the South Africa Field Force Casualty List 1899–1902.(60)
| Surname | Initials | Rank | Outcome |
|---|---|---|---|
| Adams | J | Private | POW |
| Ainger | J | Private | Missing |
| Alexander | J | Private | Wounded and POW |
| Allen | AL | 2nd Lieutenant | Wounded and POW |
| Arbon | J | Private | POW |
| Arnull | T | Private | Died of wounds |
| Arrowsmith | H | Lance Sergeant | Killed |
| Atkins | H | Private | POW |
| Attwell | J | Lance Corporal | Killed |
| Audley | E | Private | Wounded and POW |
| Audsley | W | Lance Corporal | Killed |
| Baker | C | Private | Missing |
| Baldwin | S | Private | Wounded and POW |
| Baltzer | W | Private | Killed |
| Barber | C | Lance Corporal | Wounded and POW |
| Surname | Initials | Rank | Outcome |
|---|---|---|---|
| Barnes | S | Private | Killed |
| Beakie | A | Private | Missing |
| Bebford | C | Private | POW |
| Bonner | F | Private | Wounded and POW |
| Bowell | J | Lance Corporal | POW |
| Brett | CAH | Captain | Wounded and POW |
| Bridge | A | Private | Killed |
| Britton | H | Colour Sergeant | POW |
| Brown | AW | Captain | Died of wounds later |
| Brown | J | Private | POW |
| Butler | 2nd Lieutenant | Wounded and POW | |
| Carey | SJ | Lieutenant | Killed |
| Carter | J | Drummer | POW |
| Carter | R | Private | Wounded |
| Case | W | Private | POW |
| Surname | Initials | Rank | Outcome |
|---|---|---|---|
| Cawley | J | Lance Corporal | POW |
| Cawley | W | Private | POW |
| Childs | G | Private | POW |
| Clarke | A | Lance Corporal | Missing |
| Clarke | C | Private | Wounded |
| Clarke | J | Private | POW |
| Clive | J | Private | POW |
| Coleman | F | Corporal | POW |
| Collins | S | Private | POW |
| Cooke | G | Private | Wounded |
| Cooper | A | Private | POW |
| Cordon | T | Private | Wounded |
| Crick | R | Private | POW |
| Croft | W | Private | Wounded and POW |
| Surname | Initials | Rank | Outcome |
|---|---|---|---|
| Cuthbert | W | Private | Killed |
| Darley | J | Private | Wounded and POW |
| Doggett | R | Private | POW |
| Dowe | W | Corporal | POW |
| Edwards | S | Private | Wounded and POW |
| Everett | E | Private | POW |
| Farrow | H | Private | POW |
| Fooks | J | Colour Sergeant | POW |
| Frost | H | Colour Sergeant | Wounded and POW |
| Fulcher | W | Private | Killed |
| Gardner | W | Corporal | Wounded |
| Garner | J | Private | POW |
| Goddard | A | Lance Corporal | POW |
| Goodwin | H | Private | Wounded |
| Goose | F | Private | POW |
| Surname | Initials | Rank | Outcome |
|---|---|---|---|
| Goslin | A | Private | POW |
| Goulding | G | Private | POW |
| Goymer | W | Private | POW |
| Graham | VWH | Major | Wounded |
| Green | P | Private | POW |
| Greenwood | G | Private | Killed |
| Griffiths | E | Private | Wounded and POW |
| Hackett | C | Private | Wounded and POW |
| Hall | W | Private | POW |
| Handscombe | J | Colour Sergeant | Wounded and POW |
| Harper | H | Private | POW |
| Harrold | J | Private | POW |
| Hawkins | W | Private | POW |
| Hayward | N | Colour Sergeant | Wounded and POW |
| Heriot | J | Private | POW |
| Surname | Initials | Rank | Outcome |
|---|---|---|---|
| Hester | R | Private | Wounded and POW |
| Hodson | H | Private | POW |
| Holland | R | Private | POW |
| Hull | W | Private | POW |
| Humphreys | R | Private | Wounded and POW |
| Inde | J | Corporal | POW |
| Ireland | P | Private | Wounded |
| Kidd | C | Private | Killed |
| Kirby | C | Private | POW |
| Knott | R | Private | POW |
| Laflan | W | Private | Wounded |
| Larke | H | Private | Wounded and POW |
| Laws | R | Private | POW |
| Lazzell | J | Lance Corporal | POW |
| Lazzell | W | Corporal | POW |
| Surname | Initials | Rank | Outcome |
|---|---|---|---|
| Lees | A | Private | POW |
| Lowe | C | Private | Wounded |
| Lucas | A | Private | Wounded and POW |
| Macue | C | Private | POW |
| Martin | E | Private | Wounded and POW |
| Matthews | J | Private | Wounded and POW |
| McCarthy | P | Private | POW |
| Miller | J | Private | Wounded |
| Morgan | E | Sergeant | Killed |
| Morrison | F | Lance Corporal | Wounded and POW |
| Murling | C | Private | Wounded |
| Murton | J | Private | Killed |
| Muskett | F | Private | Killed |
| Newman | A | Private | Killed |
| Newson | F | Private | POW |
| Surname | Initials | Rank | Outcome |
|---|---|---|---|
| Newson | R | Private | POW |
| Nixon | H | Lance Corporal | Killed |
| Norfolk | J | Private | POW |
| Osbourne | J | Private | Wounded and POW |
| Palmer | H | Sergeant | Wounded |
| Parker | T | Lance Corporal | POW |
| Pawsey | F | Private | Wounded |
| Pears | C | Private | POW |
| Phipps | H | Private | Wounded |
| Prigg | G | Private | Killed |
| Pryke | S | Private | Killed |
| Purdy | W | Lance Corporal | POW |
| Racter | S | Private | Wounded |
| Radley | W | Private | Died of wounds |
| Ranner | R | Private | POW |
| Surname | Initials | Rank | Outcome |
|---|---|---|---|
| Ransom | T | Private | Killed |
| Rayment | J | Private | POW |
| Read | W | Private | POW |
| Reynolds | W | Private | POW |
| Risby | G | Private | POW |
| Robinson | J | Private | Killed |
| Rogers | W | Private | POW |
| Ruddock | M | Colour Sergeant | Missing |
| Russell | H | Private | POW |
| Seamons | T | Private | Killed |
| Sillitoe | E | Private | Killed |
| Skeet | J | Private | Wounded and POW |
| Skippings | J | Private | Missing |
| Smith | A | Private | POW |
| Smith | A | Private | POW |
| Surname | Initials | Rank | Outcome |
|---|---|---|---|
| Smith | C | Private | POW |
| Southgate | A | Private | POW |
| Sparkes | A | Private | POW |
| Sparrow | W | Private | POW |
| Steam | J | Private | POW |
| Stearns | B | Private | Wounded |
| Stock | W | Private | Killed |
| Stollery | W | Private | Missing |
| Taylor | T | Private | POW |
| Thompson | F | Private | Killed |
| Thomson | WG | Captain | POW |
| Vaughan | J | Private | POW |
| Wallace | H | Private | Missing |
| Ward | C | Private | Wounded |
| Watling | W | Private | POW |
| Surname | Initials | Rank | Outcome |
|---|---|---|---|
| Watson | AJ | Colonel | Killed |
| Watson | W | Private | Wounded |
| Wayman | J | Private | POW |
| Webb | T | Private | Missing |
| West | J | Sergeant | Wounded |
| White | CA | Lieutenant | Killed |
| Wiles | A | Private | Wounded and POW |
| Wilkins | FAR | Lieutenant | Killed |
| Willibye | C | Private | POW |
| Woodford | S | Private | POW |
| Wood-Martin | FW | 2nd Lieutenant | Wounded and POW |
Boer Forces
Boer Memorial in the Colesberg Cemetery
(Source: AngloBoerWar.com/ /
9105-memorial-to-boers-in-colesberg
accessed 8 March 2026.)
The following information is taken from the Red Cross list as published in the Staatscourant, 10 January 1900.(61)
| Surname | Name | Age | Farm or Address | Commando |
|---|---|---|---|---|
| Botha | Frederik Joh P | Nooitgedacht, dist. Heilbron | Van Vuuren | |
| Erasmus | Daniel E (JZn) | 19 | Poortje, dist. Heilbron | Van Vuuren |
| Grobbelaar | Jan Hendrik | 35 | Wildehondsfontein, dist. Heilbron | Van Vuuren |
| Herbst | Johannes J | 18 | Middeldrift, dist. Heilbron | Van Vuuren |
| Mouton | Wijnand | 17 | Roodepoort, dist. Heilbron | Van Vuuren |
| Postimus | Jacobus | 31 | Kafferskraal, dist. Heilbron | Van Vuuren |
| van Staden | Antdonie W | 26 | Modderfontein (Parijs), dist. Heilbron | Van Vuuren |
| van Wijk | Petrus J | 44 | Spruitfontein (Parijs) , dist. Heilbron | Van Vuuren |
| Surname | Name | Age | Farm or Address | Commando | Description of injury | Additional notes |
|---|---|---|---|---|---|---|
| de Beer | Nicolaas JS | Daggafontein, dist. Dewetsdorp | Grobler | Leg wound, flesh wound. | ||
| de Beer | Reinier JP | 18 | Hartebeestfontein, dist. Heilbron | Van Vuuren | Above tde left knee and left tdigh by a shell. | Heavily wounded. |
| De Nekker | Adolf J | 23 | Procedeerfontein, dist. Heilbron | Van Vuuren | Above left knee, flesh wound. | Light injuries. |
| Dijzel | Petrus J | ZARP | Wounded on his back and side. | Heavily wounded (Dr Krause). | ||
| Eksteen | Cornelis J | Unknown. PO Honingspruit, dist. Kroonstad | Grobler | Left leg shot off below the knee. | Died in hospital in Colesberg on 8 January 1900. | |
| Erasmus | BJ | Zaaiplaats, dist. Heilbron | Van Vuuren | Light wound on left arm. | ||
| Erasmus | EP | Zaaiplaats, dist. Heilbron | Van Vuuren | Graze to left arm, light. | ||
| Erasmus | Pieter J | Doorndraai, dist. Heilbron | Van Vuuren | Left side, deep flesh wound. | Relatively heavily wounded. |
| Surname | Name | Age | Farm or Address | Commando | Description of injury | Additional notes |
|---|---|---|---|---|---|---|
| Hattingh | JF | Heilbron | Van Vuuren | Wounded in neck, flesh wound. | ||
| Joubert | Petrus Francois | Johannesburg | ZARP | Through thigh, flesh wound. | ||
| Maré | D (Lieutenant) | ZARP | Heavily wounded, bullet to the head. | Died at Colesberg on 8 January 1900, attended Dr Krause | ||
| Matthee | Barend PJ | 36 | Inloop, dist. Frankfort | Van Vuuren | Back wound beneath shoulder blade, flesh wound. | |
| Mouton | Abraham J | Palmietpol, dist. Heilbron | Van Vuuren | Bullet entered behind left ear and exited below the left eye. | Heavily wounded. | |
| Olivier | Gert C | Roodepoort, Viljoensdrift, dist. Heilbron | Van Vuuren | Right buttock, back of neck, flesh wound. | Not heavily wounded. | |
| Ollewa | MJ | ZARP | Shell wound, left chest and lip. | According to General Schoeman not a dangerous injury. |
| Surname | Name | Age | Farm or Address | Commando | Description of injury | Additional notes |
|---|---|---|---|---|---|---|
| Roberts | Luit | ZARP | Toe wound. | According to General Schoeman not a dangerous injury. | ||
| Smit | Christiaan A | 22 | Weltevreden, dist. Heilbron | Van Vuuren | Left hand between thumb and index finger. | Relatively heavily wounded. |
| Smit | Jacobs | 26 Melle Str, Braamfontein (Johannesburg) | ZARP mounted police | Leg injury. | ||
| Steenberg | Johann J | 26 | Parijs, dist. Vrede | Van Vuuren | Left elbow, flesh wound. | |
| Steyn | Theunis L | 26 | Keerom, dist. Heilbron | Van Vuuren | Right buttock and through the left shoulder blade, exiting at the right rear of the neck. | |
| Taljaard | Jozua JF | ZARP foot police | Double break in left leg. | |||
| van Tonder | Willem JP | Blijvooruitzicht, dist. Heilbron | Van Vuuren | Both knees. | Light injuries. |
| Surname | Name | Age | Farm or Address | Commando | Description of injury | Additional notes |
|---|---|---|---|---|---|---|
| Venter | Dirk J | Vogelfontein, dist. Phillipolis | EK Grobler | Shot to the thigh, heavily wounded. | Caused by human error. | |
| Venter | Jan Andriaan | Locksfontein, dist. Colesberg | EK Grobler | Left ring finger shot off. |
Acknowledgements
Jean Deathridge at the Suffolk Regimental Museum in Bury St Edmonds for assisting with documents from the regimental archive.
Charmaine Rous and her husband for Colesberg photographs and investigating the terrain and specific physical aspects of Suffolk Hill.
Thanks to Dewald Nel for obtaining documents, including the copies of the Staatscourant. They have been so useful.
To Erna Kritzinger, thank you for your proofreading and suggestions regarding the content.
Bibliography
Papers and periodicals
Footnotes
(i) Heilbron was primarily agricultural and is within an area known as Riemland, with riem referring to strips of leather taken from hunted animals (or cattle) and used to make practical items like rope, but were also popular when worked into chairs to form the seat. Heilbron is in a relatively flat and peaceful part of the Free State.
(ii) the Forster Education Act of 1870 (also Elementary Education Act of 1870) provided a framework for the compulsory education of children at elementary level, thus of ages 5 to 11, in England and Wales. the effect was to create a more literate public, and by 1899 Britain had an eager reading public.
(iii) The date conflicts with the official shipping records, but it is a small detail.
(iv) the “ditch” referred to is a non-perennial river that fills when there is heavy rain, but is mostly dry. It would certainly present an obstacle in the dark.
NOTES
(1) Suffolk Regiment Museum, An introduction to the Regiment https://www.suffolkregimentmuseum.co.uk/history-of-the-suffolk-regiment/ [accessed 19 August 2025].
(2) Venter , L, Oelofse, M, Van Zyl, J. 2024. the Composition of the Imperial British Forces in
the Anglo-Boer War, 1899–1902: A Military and Socio-Historical Overview. Scientia Militaria, vol. 52, no. 2.
(3) Naude, PA du P. 1913. Letter to Colonel George Montagu of the Suffolk Regiment from Heilbron, 2 November. Suffolk Regimental Museum, reference GB554/A14/13. Kindly supplied by Jean Deathridge.
(4) Tylden, Geoffrey (Major). 1982. The Armed Forces of South Africa 1659–1954. Johannesburg: Trophy Press. p. 214
(5) Muller, Cornelis Hermanus. 2016. Policing the Witwatersrand: A history of the South African Republic Police, 1886–1899. Thesis submitted for Doctor of Philosophy, University of the Free State.
(6) Van den Bergh, Gert Nicholaas. 1973. Die Polisiediens in die Zuid-Afrikaansche Republiek. Thesis for the degree D. Litt, Potchefstroom Univeristy for Christian Higher Education.
(7) Steyn, Richard. 2022. Milner: Last of the Empire Builders. Jonathan Ball Publishers. Kindle Edition. p. 127.
(8) Hughes, Jacqueline Beaumont. 1999. The Press and the Public during the Boer War 1899–1902. The Historian, issue 61, January. p. 10.
(9) Charters, DA. 2009. Counter-insurgency Intelligence: the Evolution of British theory and Practice, The Journal of Conflict Studies, vol. 29. p. 56.
(10) Pretorius, Fransjohan. 2024. Die Britse Intelligensiediens tydens die Anglo-Boereoorlog 1899–1902. Tydskrif vir Geesteswetenskappe, vol. 64, no. 4, December. pp. 549–552.
(11) Wessels, André. 2003. the British view of a war in South Africa (1899). Southern Journal for Contemporary History, vol. 28, no 2. pp. 153–167.
(12) Ibid. p. 156.
(13) Butler, Lewis William George (Lieutenant- Colonel). 1909. Sir Redvers H Buller, VC: the Story Of His Life And Campaigns. London: Normanby Press. Kindle Edition.
(14) Wessels, André. 2002. An assessment of the British Military Strategy during the Anglo-Boer War up to “Black Week”, December 1899. Southern Journal for Contemporary History, vol. 27, no. 2.
(15) Spiers, Edward M. 2010. The learning curve in the South African War: Soldier’s perspectives. Historia volume 55, issue 1 (May). p. 4
(16) Shipping records from the London Times of Saturday, 4 November 1899 available on AngloBoerWar.com via link https://www.angloboerwar.com/other-information/86-shipping-records/1795-shipping-records-november-1899 [accessed 9 September 2025].
(17) Shipping records from the London Times of Thursday, 16 November 1899 available on AngloBoerWar.com via link
https://www.angloboerwar.com/other-information/86-shipping-records/
1795-shipping-records-november-1899 [accessed 27 January 2025].
(18) Shipping records from the London Times of Wednesday, 29 November 1899 available on AngloBoerWar.com via link https://www.angloboerwar.com/other-information/86-shipping-records/1795-shipping-records-november-1899 [accessed 27 January 2025].
(19) Turner, James. 1999. Correspondence from Walsham Le Willows, Suffolk with transcribed letters of the men of the Suffolk Regiment, batch 1, letter 1.
(20) Hillegas, Howard Clemens. 1900. With the Boer Forces. London: HardPress Publishing. Kindle Edition. p. 38.
(21) Ellis, Johan. 2000. Musketry: the Anglo Boer War experience. Historia, vol. 45, no. 2.
(22) Ellis, J. 2019. the British tactical reaction to battlefield conditions during the Anglo-Boer War. Southern Journal for Contemporary History. p. 148
(23) De Jongh, Michael; Gordon, Belinda. 2018. The Forgotten Front: Untold stories of the Anglo-Boer War in the Karoo. Plettenberg Bay: the Watermark Press. p. 35.
(24) Dooner, Mildred G. 1903. The Last Post: Being a roll of all officers (naval, military or colonial) who gave their lives for their Queen, King and country in the South African War 1899–1902. London: Simpkin, Marshall, Hamilton, Kent & Co.
(25) Maurice, Frederick (Major-General, Sir). 1906. History of the War in South Africa 1899–1902, Chapter XXIV, Operations Round Colesberg – December 16th 1899 to February 6th 1900. London: British Government. (Kindle Edition). p. 389.
(26) Naude, PA du P. 1913. Letter to Colonel George Montagu of the Suffolk Regiment.
(27) ZA Hansards. Historical Debates of the South African Senate and House of Assembly. House of Assembly Sittings in 1913. PJG Theron, Heilbron. https://www.hansards.org.za/hoa/1913/ [accessed 6 February 2026].
(28) Garner, James. Date unknown. Report by James Garner. Brett Papers, Reference GB554Y/Y1/35bb, Suffolk Regimental Museum, Bury St Edmonds, UK. Kindly supplied by Jean Deathridge.
(29) Allen, AL (Lieutenant). 1902. Letter detailing events before and during the Battle of Suffolk Hill, 6 January. Reference GB554Y/Y1/35bb, Suffolk Regimental Museum, Bury St Edmonds, UK. Kindly supplied by Jean Deathridge.
(30) Ibid.
(31) Brett, CAH (Captain). 1900. Letter to Colonel George Montagu discussing the Battle of Suffolk Hill (Grassy Hill) and the sequence of events prior to the battle. Written 23 April from Pretoria where he was held as a prisoner of war.
(32) Ipswich War Memorial. The Suffolk Regiment during the Boer War. A piece from the Daily News special correspondent is quoted, named “Disaster to the Suffolks marching in canvas shoes and socks. The wounded in enemy hands."
https://www.ipswichwarmemorial.co.uk/the-suffolk-regiment-during-t
he-boer-war/ [accessed 6 February 2026].
(33) Brett, CAH (Captain). 1900. Letter to Colonel George Montagu discussing the Battle of Suffolk Hill.
(34) Turner, James. 1999. Correspondence from Walsham Le Willows, Suffolk with transcribed letters of the men of the Suffolk Regiment, batch 2, letter 10. Letter by an anonymous soldier to the Daily Mail.
(35) Allen, AL (Lieutenant). 1902. Letter detailing events before and during the Battle of Suffolk Hill, 6 January.
(36) Ibid.
(37) Ibid.
(38) Brett, CAH (Captain). 1900. Letter to Colonel George Montagu discussing the Battle of Suffolk Hill.
(39) Allen, AL (Lieutenant). 1902. Letter detailing events before and during the Battle of Suffolk Hill.
(40) Brett, CAH (Captain). 1900. Letter to Colonel George Montagu discussing the Battle of Suffolk Hill.
(41) The Lords Commissioners of the Admirality. 1900. The Nautical Almanac and Astronomical Ephemeris for the year 1900 for the Meridian of the Royal Observatory at Greenwich. London: Her Majesty’s Stationery Office. pp. 4–6. Available via Hathi Trust at https://hdl.handle.net/2027/mdp.39015068169930 [accessed 6 February 2026]. The data has been adjusted for the position of Colesberg, for which the co-ordinates are:
30°42’14.22”S, 25°06’22.99”E.
(42) Naude, PA du P. 1913. Letter to Colonel George Montagu of the Suffolk Regiment.
(43) Allen, AL (Lieutenant). 1902. Letter detailing events before and during the Battle of Suffolk Hill.
(44) Brett, CAH (Captain). Undated. Report from Captain Brett with further detail relating to the battle of Grassy Hill, 6 January 1900.
(45) Turner, James. 1999. Correspondence from Walsham Le Willows, Suffolk with transcribed letters of the men of the Suffolk Regiment, batch 2, letter 8. Letter written by Corporal Charles Watts from Arundel on 11 January 1900 to his father.
(46) Brett, CAH (Captain). 1900. Letter to Colonel George Montagu discussing the Battle of Suffolk Hill.
(47) Turner, James. 1999. Correspondence batch 2, letter 8. Letter written by Corporal Charles Watts.
(48) Allen, AL (Lieutenant). 1902. Letter detailing events before and during the Battle of Suffolk Hill.
(49) Brett, CAH (Captain). 1900. Letter to Colonel George Montagu discussing the Battle of Suffolk Hill.
(50) Allen, AL (Lieutenant). 1902. Letter detailing events before and during the Battle of Suffolk Hill.
(51) Garner, James. Date unknown. Report by James Garner. Brett Papers, Reference GB554Y/Y1/35bb, Suffolk Regimental Museum, Bury St Edmonds, UK. Kindly supplied by Jean Deathridge.
(52) Naude, PA du P. 1913. Letter to Colonel George Montagu of the Suffolk Regiment.
(53) Ibid.
(54) Turner, James. 1999. Correspondence from Walsham Le Willows, Suffolk with transcribed letters of the men of the Suffolk Regiment, batch 2, letter 8. Letter written by Corporal Charles Watts from Arundel on 11 January 1900 to his father.
(55) Turner, James. 1999. Correspondence from Walsham Le Willows, Suffolk with transcribed letters of the men of the Suffolk Regiment, batch 2, letter 9. Letter by Private J Ruffles to his home in Tayfen Road, Bury St Edmonds. This letter was published in the Bury Free Press on 3 March 1900.
(56) Naude, PA du P. 1913. Letter to Colonel George Montagu of the Suffolk Regiment.
(57) Van Dam, GM (Commandant). 1900. Report on Colesberg events. ZARPs.
(58) Brett, CAH (Captain). 1900. Letter to Colonel George Montagu discussing the Battle of Suffolk Hill.
(59) Ibid.
(60) South Africa Field Force Casualty List 1899–1902. Section 11 October 1899 to 20 March 1900. pp. 32–35.
(61) Pretoria Archives. Staatscourant. Mededeelingen van het Informatie-Bureau van het “Roode Kruis”, List no. 27, p. 48, 10 January 1900. Gevecht bij Colesberg op 4 en 6 Januarie 1900. Document courtesy of Dewald Nel.
About the Authors:
After many in-depth discussions, drawing on Belinda Gordon's deep knowledge of the battles around Colesberg, this piece was written and final research done by Gina Shepherd. Gordon was the curator of the Kemper Museum in Colesberg from 1990-2007. She has given a number of talks, and led many tour groups over the Second Anglo-Boer War battlefields around Colesberg, including descendants of those who fought there. Shepherd is a genealogist, a retired editor of the genealogical publication Familia and history enthusiast and regularly writes about both.
Return to Journal Index OR Society's Home page
South African Military History Society / scribe@samilitaryhistory.org