
 The South African
by Tiaan Jacobs, DWD
1. Introduction
My interesting hobby of collecting medals includes researching the history behind the origin of military medals crossing my way.
On the 24th of August 1984, I had the honour of been presented with the John Chard medal during a Medal Parade at Zeerust in the North West Province, by Brigadier JJ Bischoff of the 2nd Special Services Battalion.
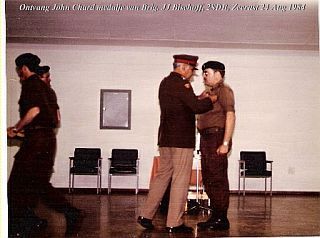
Speaker receiving John Chard medal
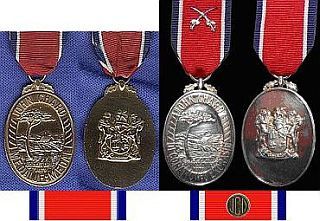
John Chard Medal and Decoration
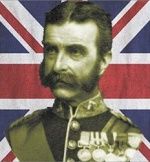
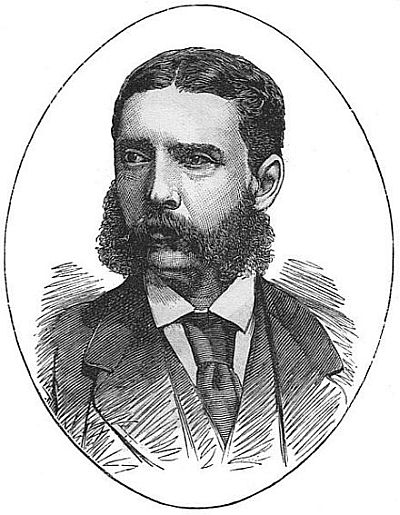
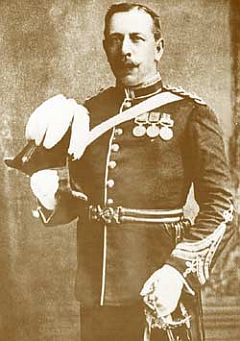
During my research of the medal, I discovered that the medal was designated in honour of Lieutenant John Rouse Marriot Chard, VC, Royal Engineers, who in 1879 commanded the defence of Rorkeĺs Drift, repelling attacks by Cetshwayoĺs impis. Lieutenant Chard, VC, set an outstanding example of the value of preparedness and of the qualities of leadership and perseverance in the face of overwhelming odds.
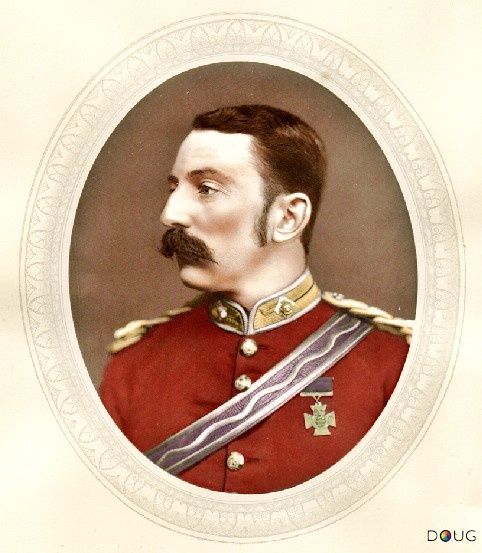
Lt Col John Rouse Marriot Chard, VC
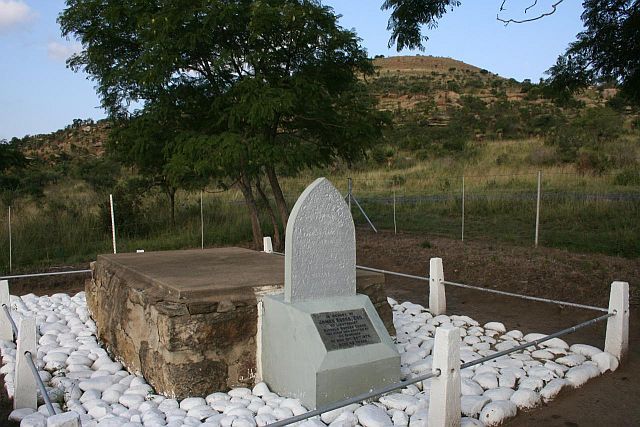
James Rorke's grave
The subject of my presentation is the Battle of Rorkeĺs Drift. Rorke's Drift, known as kwaJim ("Jim's Land") in the Zulu language, was a mission station and the former trading post of James Rorke, an Irish merchant. It was located near a drift, or ford, on the Buffalo (Mzinyathi) River, which at the time formed the border between the British colony of Natal and the Zulu Kingdom.
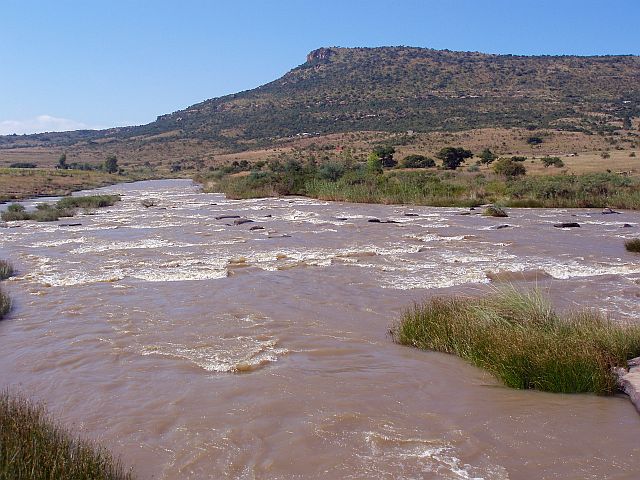
Buffalo River at Rorke's Drift
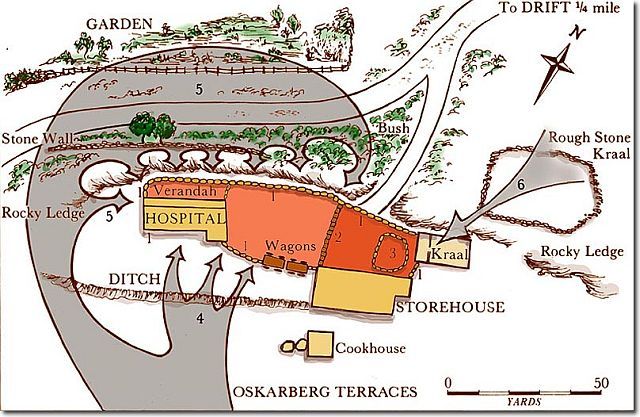
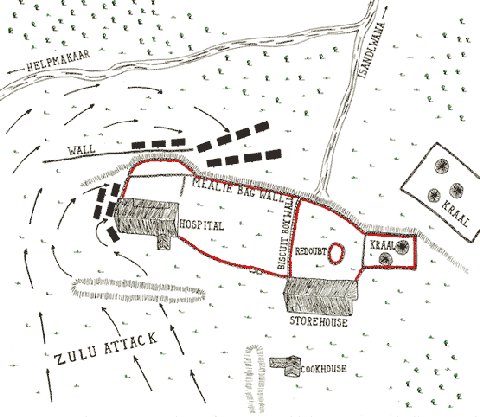
Map of Rorke's Drift
On the right side of the map was the kraal facing to the north. In the centre was the store and to the far left was the hospital. A mealie bag barrier was erected between the buildings to form a safety wall for defence of the outpost against the oncoming Zulu force.
2. Historical Background
In January of 1879 the kingdom of the Zulus was at great odds with invading forces of settlers from various parts of the globe. A confrontation was sought by the British in the person of Lord Chelmsford and several battles ensued in the effort to establish power.
On 9 January 1879, the British No 3 (Centre) Column, under Lord Chelmsford, arrived. On 11 January, the date the British ultimatum to the Zulus expired, the column crossed the river and encamped on the Zulu bank.
Lord Chelmsford
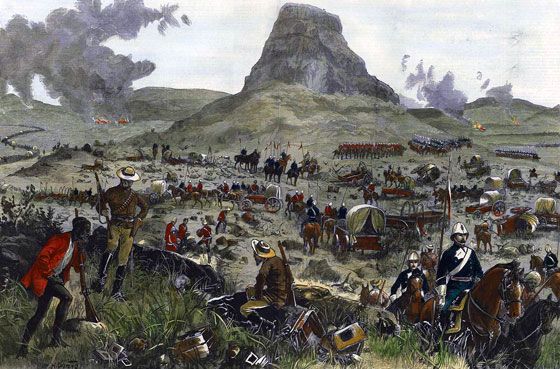
On 20 January, after reconnaissance patrolling and building of a track for its wagons, Chelmsford's column marched to Isandlwana, approximately 6 miles (9.7ákm) to the east, leaving behind the small garrison.
Advance of Lord Chelmsford's column from Rorke's Drift
The first battle that took place in the region around the Buffalo River was the battle of Isandlwana and the British forces were decimated in a bloody confrontation. Some of the Isandlwana survivors had reached the post and had given Bromhead the stark facts - that the camp at Isandlwana had been taken and barely a man had got out of the mess alive.
Massacre of 1st Battalion 24th Foot at Isandlwana
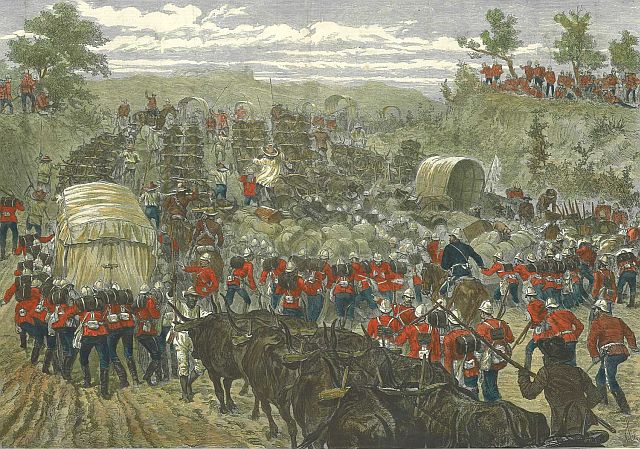
Retrieving the wagons after the bloody battle
On the same day a part of the Zulu Impi proceeded to the settlement at Rorkeĺs Drift where they attacked a small party of British soldiers. The men of ôBö company 2/24th Regiment and others who had been ordered to stay behind at the Rorkeĺs Drift supply depot, had reason for feeling left-out. Looking after stores and hospital patients was not what soldiering was about, whereas their comrades, including the entire 1st Battalion were marching into the Zulu Kingdom intent on destroying the capital at Ondini (Ulundi) and hoping to capture the first prize, King Cetshwayo Ka-mPande. Brevet Major, Henry Spalding (104th Regiment) was in overall command of the post. His responsibilities included keeping open lines of communication and making sure that supplies were moved forward to the main force in enemy territory. Wednesday, the 22nd January, was proving to be just another tedious day and Spalding, already anxious that two extra companies of the 24th Regiment had not arrived from the fort at Helpmekaar, decided to go and see if anything was amiss.
After consulting his army list, he saw that Lt. John Rouse Merriot Chard (5th Company - Royal Engineers) was the next most senior officer. Spalding left camp with the immortal words: ôYou will be in charge, although, of course nothing will happen, and I shall be back again early this evening.ö
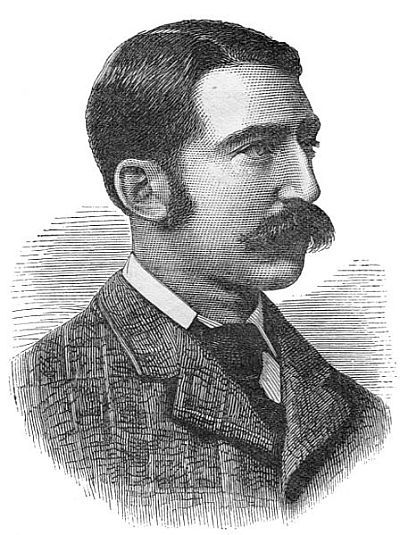
Lt. John Rouse Merriot Chard, Royal Engineers
The British force in Natal was in need of engineers and Chard had been called up to the border to primarily maintain the pontoons positioned on the Buffalo River.
These pontoons which, due to the flooded state of the river were an essential part of the invasion plan, had taken a severe pounding due to the almost constant flow of military traffic into Zululand.
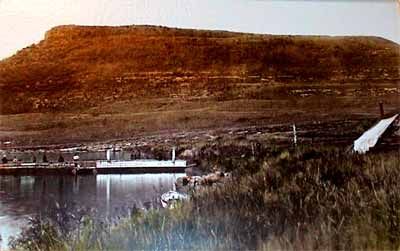
A contemporary "colourised" photograph showing the pontoons at Rorke's Drift
Chard and a hand-full of men from 5th Company had arrived in Durban on the 5 January and were at the Drift by the 19th. Three days later he was in command of the garrison and although he had previously been on foreign service, he had never seen any action. He seemed to have been well liked amongst his fellow officers but as a company officer, he was described as being ôA plodding, dogged sortö and ôHopelessly slow and slack.ö
The duty of second-in-command devolved to Lt. Gonville Bromhead who was in command of ôBö Company 2/24th. An unassuming character, he was often called ôThe Deaf Dufferö and was once described as being ôfearless but hopelessly stupid.ö Some of the men under his command might even have blamed his condition for been one of the reasons why they had not been invited to join the advance column in Zululand.
Lt. Gonville Bromhead
3. Battle of Rorkeĺs Drift
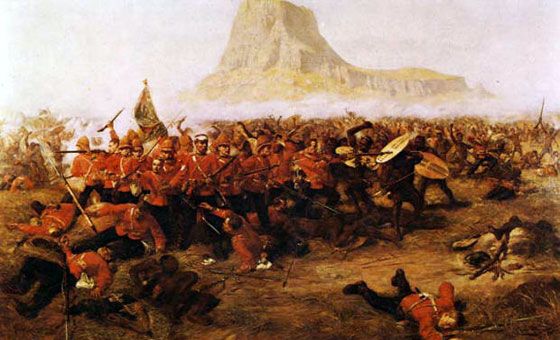
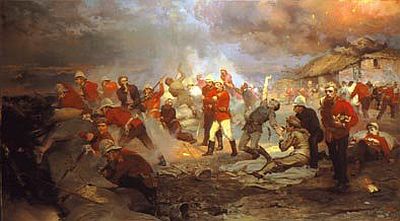
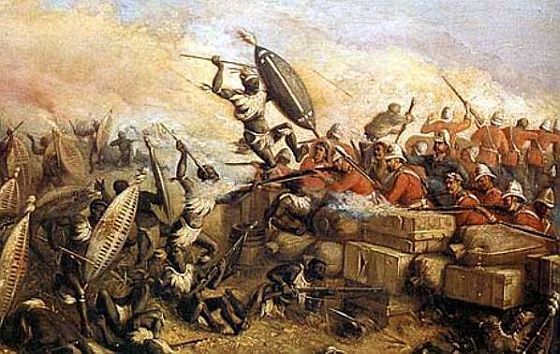
The Battle of Rorke's Drift was one of many battles in the Anglo-Zulu War. The defence of the mission station of Rorke's Drift immediately followed the British Army's disastrous and apparently inexplicable slaughter of the 1st Battalion, the 24th Foot, at the Battle of Isandlwana earlier that morning on 22 January 1879, and continued to the following day, 23 January.
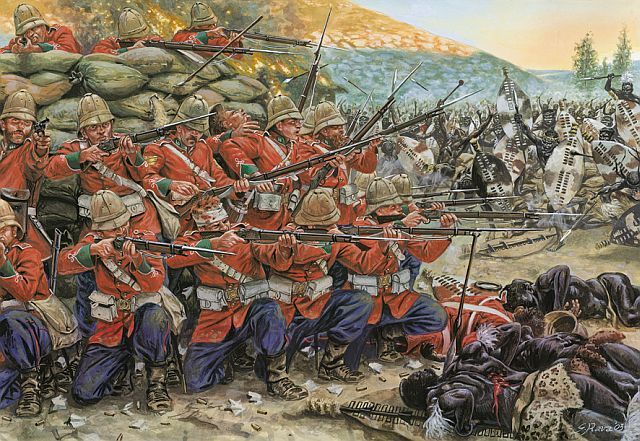
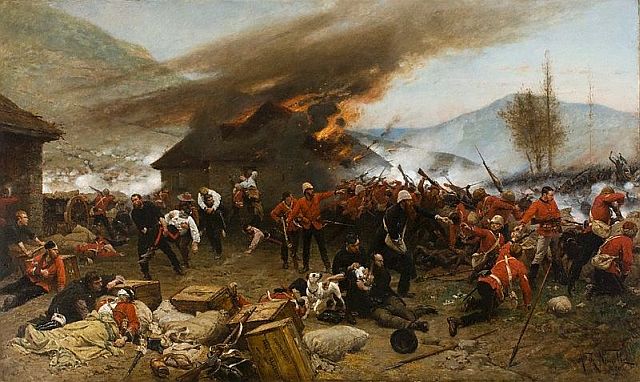
(A painting of) the Battle at Rorke's Drift
One hundred and thirty-nine British soldiers successfully defended their garrison against an intense assault by four to five thousand Zulu warriors. The overwhelming Zulu attack on Rorke's Drift came very close to defeating the tiny British garrison, but Bromheadĺs B Company, 2nd Battalion of the same regiment, restored the prestige of British arms by their successful defence of the mission station.
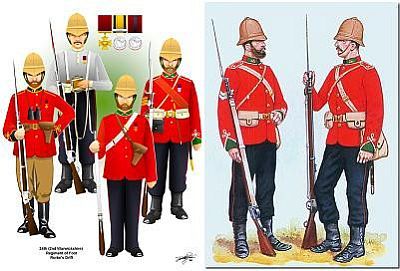
Dress code of 24th Foot
The regular British infantry were equipped with the breech loading single shot Martini-Henry rifle and bayonet. The British infantry wore red tunics, white solar topee helmets and dark blue trousers with red piping down the side. The irregular mounted units wore blue tunics and slouch hats.

Helmet of 24th Regiment of Foot
Just as it was incomprehensible to the public in Britain that 1,000 British infantry armed with modern breech loading rifles could be overwhelmed by native troops armed principally with stabbing spears, it was astounding that a handful of the same troops could withstand the overwhelming attack delivered against the mission station later the same day.
This success is held as one of history's finest defences. Eleven Victoria Crosses were awarded to the defenders, along with a number of other decorations and honours.

The Victoria Cross
Earlier, on 11th January 1879, Lord Chelmsford led the Centre Column of his invading army into Zululand, crossing the Tugela River at Rorkeĺs Drift. On 22nd January 1879, the Zulu Army sidestepped Chelmsfordĺs advancing force and wiped out the troops he had left at his advanced camp by the hill of Isandlwana, principally the 1st Battalion, 24th Foot under Colonel Pulleine.
Cetshwayo, the Zulu King, when he dispatched his army to fight Chelmsfordĺs invading columns, issued orders that his warriors were not to enter the British colony of Natal. He still hoped to negotiate a peaceful settlement of the war and did not wish to be labelled an aggressor.
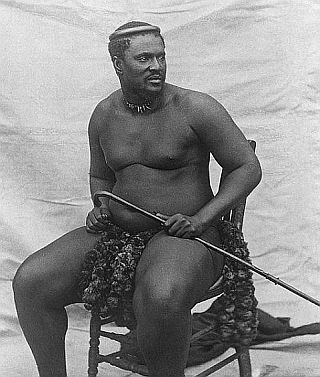
King Cetshwayo
As the battle at Isandlwana drew to a close, several Zulu regiments under Cetshwayoĺs younger brother, Prince Dabulamanzi kaMpande, reached the Tugela River, cutting off the few escaping British. These regiments had not been involved in the battle and looked for a way to join in the success. Dabulamanzi, an aggressive leader, resolved to lead these Zulu regiments to the further triumph of capturing the British base at the Rorkeĺs Drift crossing on the Tugela.
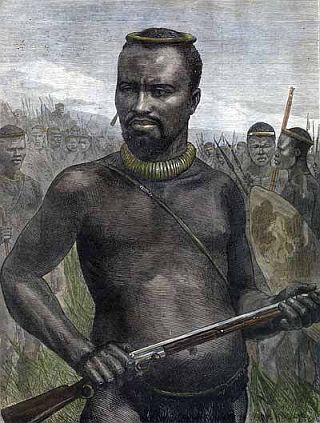
Prince Dabulamanzi kaMpande
A single company of infantry garrisoned the mission station at Rorkeĺs Drift, B Company, 2nd Battalion, 24th Foot.
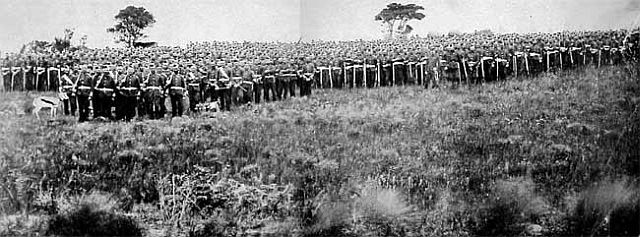
B Company, 2nd Battalion, 24th Foot
Although the 24th was designated the South Warwickshire Regiment, this company was manned largely by Welshmen.

Badge of the 24th Regiment
The company colour sergeant was Frank Bourne and the sole officer, Lieutenant Gonville Bromhead.

Lt Bromhead
The mission belonged to the Reverend Otto Witt, a Swede. Mr Wittĺs church had been turned into a store by the British Army; his house a military hospital under Surgeon James Reynolds. Lieutenant John Chard, Royal Engineers, arrived at Rorkeĺs Drift on the 19th January 1879 with a party of sappers. Chard had cause to journey up to Isandlwana immediately before the battle and on his return saw groups of Zulus.
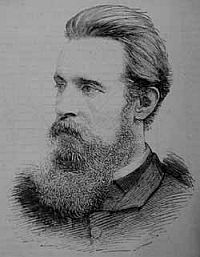
Reverend Otto Witt
On the 21st January 1879, the garrison heard firing from the distant battle and a group of officers including Surgeon Reynolds, Reverend Otto Witt and Reverend George ("Ammunition") Smith, a local Anglican missionary and Chaplain of the Weenen Yeomanry, a local volunteer unit, who was serving as a volunteer Chaplain to Number Three Column, climbed to the top of the Oskarberg and peered through a telescope towards Isandlwana.áThey could see through the heat haze what was obviously a battle taking place. They also saw what they eventually realised to be parties of Zulus advancing towards the mission station. News of the disaster at Isandlwana was confirmed by the arrival of Lieutenant Gert Ardendorff, 3rd Natal Carbineers, from the camp.
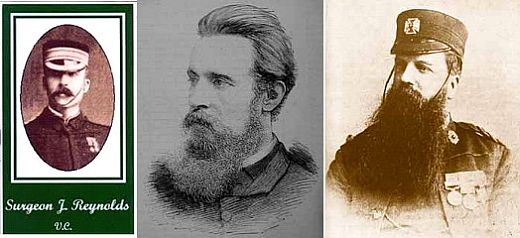
Surgeon Reynolds, Reverend Otto Witt and Reverend George (Ammunition) Smith
The British garrison set to fortifying the mission station. Tents were struck and stored and the buildings loopholed for defence. A wall of mealie bags was built from the far corner of the Hospital to the edge of the well-built stone kraal. The store (church) and building (Wittĺs house) were also linked by walls of mealie bags. The hospital was barricaded and when the mounted Basutos and the detachment of N.N.C. rode off towards Helpmekaar, a wall of biscuit boxes was built from the store to the rocky ledge to form a second line of defence.
Fortification
A party of Anthony William Durnfordĺs unit arrived and was posted forward to hold the Zulu advance as long as possible. At 4h20 pm firing was heard from the hill and the men of Durnfordĺs unit returned to the mission station and then left for Helpmekaar, the nearest Natal town. The company of Natal Native Infantry also left, leaving the regular British troops and some Natal irregulars.
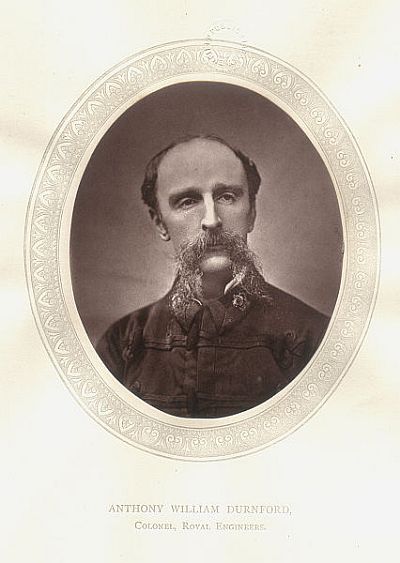
Anthony William Durnford in 1870
The garrison hurriedly built a shorter perimeter line of biscuit boxes to accommodate the greatly reduced numbers of soldiers.
The Zulu warriors were formed in regiments by age, their standard equipment the shield made from cowhide and the stabbing spear, called an iklwa.
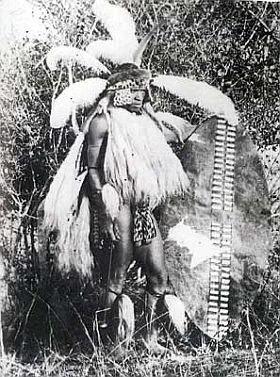
A Zulu Warrior
The formation for the attack, described as the ôhorns of the beastö, was said to have been devised by Shaka, the Zulu King who established Zulu hegemony in Southern Africa. The main, strong central body of the army, consisting of experienced fighters, formed the ôchest,ö while younger, faster warriors formed the ôhornsö. The warriors in the horns would attempt to rapidly surround the enemy, while warriors in the ôchestö would execute the main fighting. Later, a reserve warrior force, the ôloinsö, waited behind the chest to inflict a final and crushing blow on the enemyĺs rear, should they threaten to break out of the encirclement.
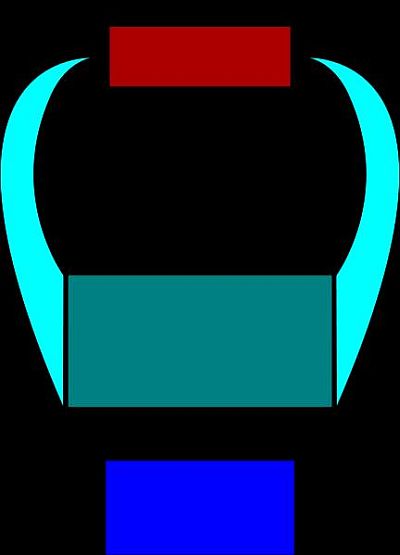
The buffalo horns formation of the Zulu Army
Cetshwayo, the Zulu King, fearing British aggression, took pains to purchase firearms wherever they could be bought. By the outbreak of war the Zulus had tens of thousands of muskets and rifles, but of a poor standard, and the Zulus were ill-trained in their use. The Zulus captured some 1,000 Martini Henry breech loading rifles and a large amount of ammunition.
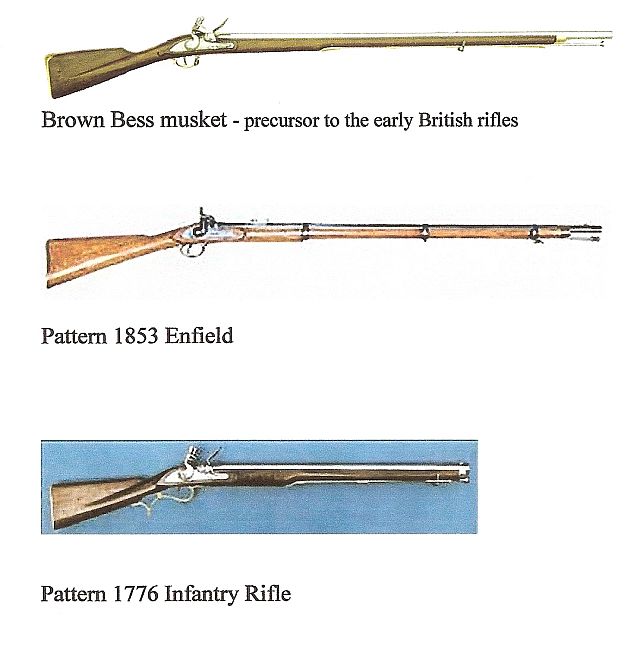
Musket and rifles
Some of these rifles were used at Rorkeĺs Drift. All the British casualties, few though they were, were shot rather than stabbed.
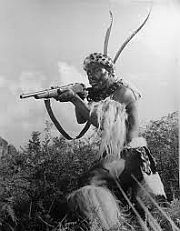
Image of Zulu warrior using a rifle
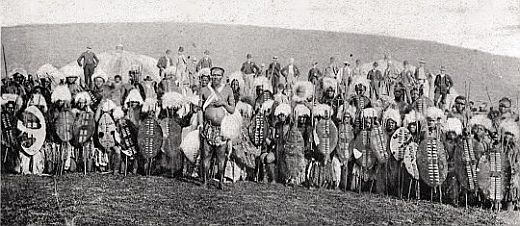
Zulu warriors at a kraal
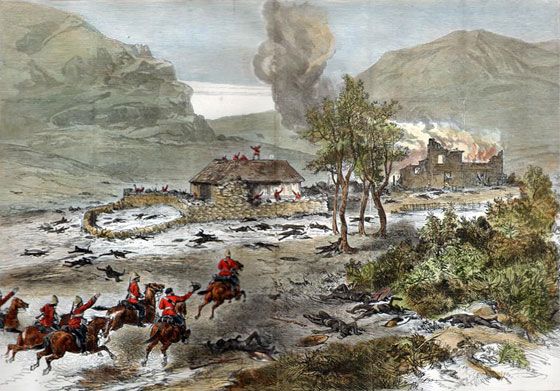
Five hundred Zulus appeared around the hill to the South, running towards the mission station. They were met by a heavy fire from the garrison and at some 50 yards from the wall veered around the hospital to attack from the North West. They were driven back by the fire from the garrison and went to ground in the undergrowth, uncleared due the shortage of time. The main body of Zulus came up and opened a heavy fire on the British from cover around the West and North West of the mission station.

Mealie bag wall with the hospital burning in the background
The hospital at the western end of the fortifications became the focus for the fighting. Set on fire and stormed by the Zulus, it became untenable. As many men were extracted as possible, the remaining patients perishing in the flames.
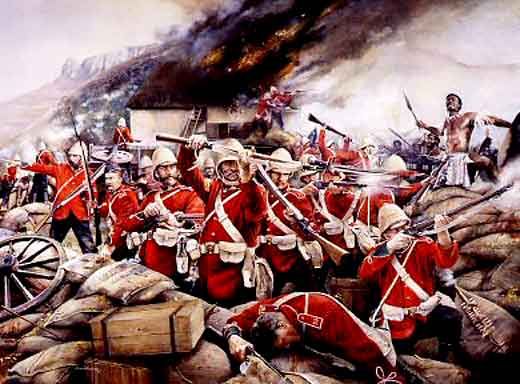
Another painting of the battle at Rorke's Drift
Privates John Williams, Henry Hook, William Jones, Frederick Hitch and Corporal William Allen all received the Victoria Cross for their defence of the hospital building, fighting with bayonets once their ammunition was expended, as they contested every room with the attacking warriors.
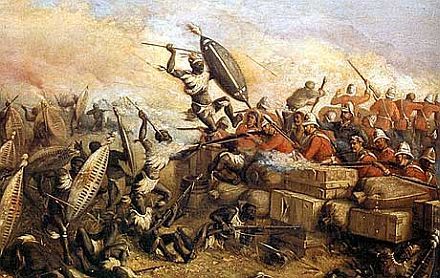
Painting of the defence at the height of the battle at Rorke's Drift
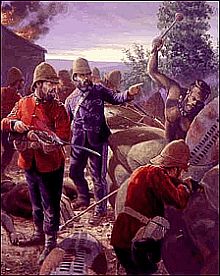
Painting showing James Langley Dalton at the defence
James Langley Dalton, Commissariat Corps, dressed in black in the centre of the photo above, received the Victoria Cross when he convinced both Chard and Bromhead not to flee but to fortify their station by means of the thousands of mealie bags and biscuits barrels available. He actively superintended the work of the defence and was amonst the foremost of those who received the first attack at the corner of the hospital, where the deadliness of his fire did great execution and where, by his cool courage, he saved the live of a man of the Army Hospital Corps by shooting the Zulu who having seized the muzzle of the manĺs rifle, was in the act of assaulting him.
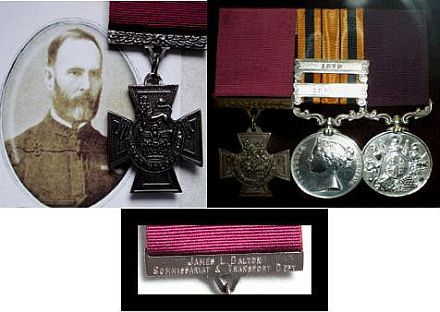
James Langley Dalton's medals
This officer, to whose energy much of the defence of the place was due, was severely wounded during the contest, but still continued to give the same example of cool courage. Today he is seen as the real hero of Rorkeĺs Drift by many Military Historians.
The fighting now concentrated on the wall of biscuit barrels linking the mission house with the mealie wall. As night fell the British withdrew to the centre of the station where a final bastion had been hastily assembled.
Defending the biscuit box wall
Lady Butler's "Defence of Rorke's Drift"
It became apparent that the Zulus could see Chelmsfordĺs column approaching from the direction of Isandlwana. The Zulus turned and left. Soon afterwards the column arrived at the drift and crossed the Tugela, marching up to the mission station. Chelmsfordĺs delight at finding the garrison alive and still resisting was heavily tempered by his despair at finding that no survivors from Isandlwana had escaped to Rorkeĺs Drift.
The relief of Rorke's Drift after the Battle on 22nd January 1879
Mark I and II Infantry Rifles, and Cavalry Carbine MkI's would have been the most prolific weapons on the British side during the 1879 Anglo Zulu War. The large, heavy .45 caliber bullets of the breech loaded Martini-Henry inflicted horrific wounds on the attacking Zulus, and many who limped off the battlefield with bullet wounds died an agonizing, painful, slow death. At Isandlhwana and Rorke's Drift, it is presumed that volley firing commenced at a range of about 400 yards. At this range, the volley firing cut large swaths into the advancing line of Zulu warriors. Considering bullet weight and velocity, it is probable that many rounds fired from 200 yards or less went through one Zulu Warrior, and possibly onto a next, severely wounding or killing him as well. It is estimated that between 20,000 and 25,000 rounds were fired during the defense of Rorke's Drift, the vast majority of the shots having missed their targets altogether. Per Lt. Chard's report, the number of Zulu dead buried by the British was 351. It is estimated that another 300 Zulus died later as a result of wounds sustained during the battle. So, conservatively speaking, every 25th shot fired by the defenders of Rorke's Drift resulted in an eventual Zulu death, and every 50th shot was an outright kill.
The garrison of the mission station comprised of 8 officers and 131 non-commissioned ranks. Of these 17 were killed and 10 wounded.
The defeat at Isandlwana brought Lord Chelmsfordĺs Centre Column back to the Tugela. Chelmsford had then to ensure that the Zulu Armies did not invade Natal. He called for substantial reinforcements and got them.

Colonel Evelyn Wood (later Field Marshal)
In March 1879 Colonel Evelyn Woodĺs Northern Column inflicted a heavy defeat on the Zulus at Khambula. In April 1879 Chelmsford relieved Colonel Charles Pearsonĺs Southern Column, entrenched for some months at Eshowe, and later renewed the advance from the Tugela.
On 4th July 1879 Cetshwayoĺs Zulu Army was utterly defeated at the Battle of Ulundi. Fighting continued in a desultory form until Cetshwayoĺs capture on 28th August 1879 and the end of the war.
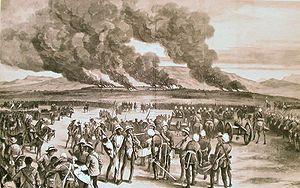
The Burning of Ulundi
4. Awards after Rorkeĺs Drift
Lieutenants Chard and Bromhead were each awarded the Victoria Cross for the defence of the Rorkeĺs Drift mission station and promoted to major.
In addition to the soldiers of the 24th who distinguished themselves in the defence of the hospital, Victoria Crosses were awarded to Surgeon Reynolds, Commissary Dalton and Corporal Schiess of the NNC. Colour Sergeant Frank Bourne and Private William Roy of the 24th Foot, Gunner John Cantwell of the Royal Artillery and Corporal Francis Attwood of the Army Service Corps were awarded the Distinguished Conduct Medal. The 1879 Zulu War medal was established to honour all those British soldiers who participated in the Anglo-Zulu Wars.
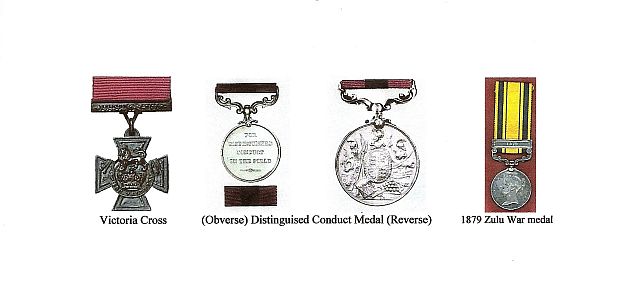
Rorke's Drift medals
Apart from the VC, John Chard was also honoured with the Zulu War medal 1879 and Queen Victoriaĺs Diamond Jubilee Commemoration medal 1897. He died in 1897 and the funeral service and burial took place on the 5th November 1897 at the Parish Church of St. John the Baptist, situated near Hatch Court, Hatch Beauchamp, Taunton, Somerset.
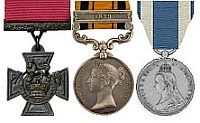
John Chard's medals
What were the medical consequences of the battle?
It seems likely that a number of the defenders of Rorkeĺs Drift subsequently suffered from what is now classified as Post Traumatic Stress Disorder: Corporal Schiess fell ôon hard timesö and died in 1884 aged 28 years; Pte John Fieldingĺs hair is said to have turned white shortly after the battle; William Jones in old age suffered from nightmares that the Zulus were about to attack; Robert Jones shot himself in 1896.
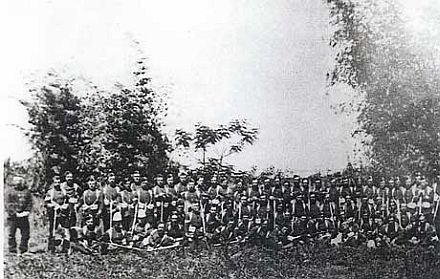
B Company 2nd Battalion 24th Foot
All the British casualties, few though they were, were shot rather than stabbed.
Lt. Col Frank Bourne, last survivor of Rorkeĺs Drift
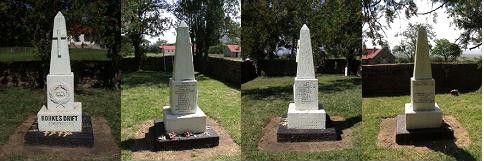
The British War Memorial, erected at Rorkeĺs Drift to commemorate the Battle
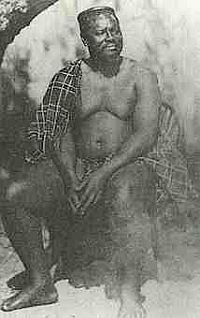
King Cetshwayo, ruler of the Zulu Nation 1873 to 1883
Following King Cetshwayo's capture at the end of August, 1879 he was taken to Cape Town where he was imprisoned, first in the Castle, and later under much less-rigorous conditions at Oude Molen, near present-day Pinelands. More than three years were to pass before his eventual return to Zululand. He sailed to England in September 1882 to meet Queen Victoria and on his return, was reinstated as King, but on terms set by the British Government. King Cetshwayo again settled at Ondini, but his homestead was attacked by Zibhebhu. He was injured and took refuge at Eshowe, where he died on 8 February 1884.
á
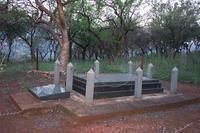
King Cetshwayo's grave
His grave is in a clearing in the Nkandla Forest, and is tended by the Shezi clan. The area is considered to be sacred by the Zulu people. Remains of a wagon that was placed on top of his grave, can be seen at the Cultural Museum at Ondini.
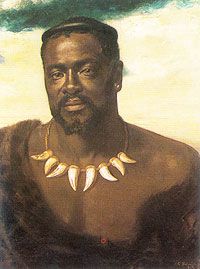
Portrait of King Cetshwayo
Poor Cetshwayo was quite a tourist attraction at the time of his imprisonment, and English ladies of gentle birth visiting Cape Town, made sure they called on the savage black potentate!
A rare and interesting little medalet is believed to date from the time of Cetshwayoĺs imprisonment. In fact, local tradition in Cape Town has it that Cetshwayo was in the habit of presenting his medal to the more important of his many visitors.
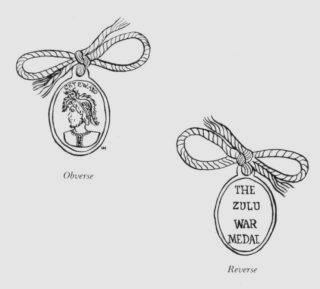
Cetshwayoĺs Zulu War Medal
This little oval medalet in cheap metal (in tin plate) is 16 mm by 13 mm in size and has a perforated 'ear' at the top through which is tied a little bow in white string. On the obverse is portrayed a fine Zulu head with decorative headdress, facing left.
Above, in tiny letters, is his name 'CETEWAYO'. On the plain reverse, in capital letters, in four lines is the inscription:- 'THE
ZULU WAR MEDAL'.
Monument to the Zulu War at Ulundi
When I look at the photo of the little Cetshwayo medalet, I link it in my mind with that only other Zulu memorial of the Zulu War, the plaque in the monument erected at Ulundi, which reads :-
Another view of the battle
Cetshwayo had no bronze crosses or silver medals with which to decorate his heroes. But he did have a means of showing his special approbation. The wood of the Umzimbete or uMyezane tree was specially reserved, on pain of death, for the Zulu king. From it, little dumbell-shaped beads were cut, which if strung together, formed an interlocking necklace. These beads were given to Zulu warriors who specially distinguished themselves in battle. A warrior wearing a necklace of these beads was regarded with no less respect than a British holder of the VC.
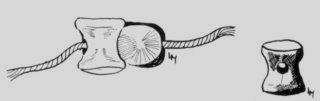
Zulu beads - their equivalent of the VC

A Monument for fallen Zulu Warriors, was also erected at Rorkeĺs Drift
5. John Chard Medal
Instituted with effect from 6 April 1952, this medal was awarded for 12 years (until 1986) or 10 years (from 1986) efficient service in the conventional SADF Citizen Force (CF). After 20 years service, a recipient could qualify for the JCD, and from 1986 he/she no longer had to stop wearing this medal once he/she had received the decoration.
The medal was awarded to members of the CF, irrespective of rank, for long and efficient service as mentioned above, not necessarily continuous.

John Chard Medal
The oval medal is of bronze and the designation and significance is the same as that of the John Chard Decoration, which is of silver.
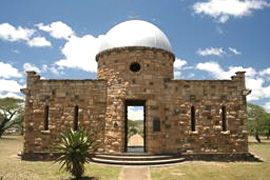
Obverse : The obverse depicts, in relief, the commissariat store and hospital which formed part of the defence of Rorkeĺs Drift in 1879, where Chard and 10 others won the Victoria Cross.
Reverse : The reverse depicts the SA coat of arms.
Ribbon : 32 mm in width, central broad 22mm red stripe, with 3mm navy blue (outer) and 1.5mm white (inner) stripes on either side : colours of the British flag.
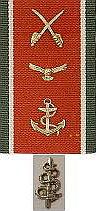
Distinguishing insignia
Distinguishing insignia in silver are worn on the ribbon to indicate the arm of the SADF in which the qualifying service was carried out:
Rorkeĺs Drift, famous, infamous but delightful is an experience not to be missed. Located on the battlefields of kwaZulu-Natal, South Africa, this little hamlet has seen some of the most significant moments in South Africaĺs history.
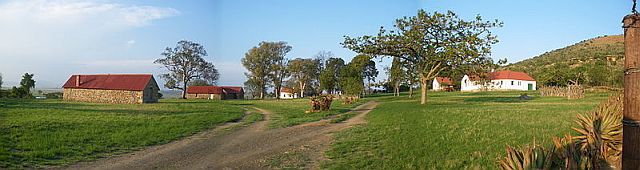
Modern day panorama
Rorkes Drift as it looks today, hospital in the top left and the church (storeroom) on the right
In more modern times the site of Rorkeĺs Drift has become the home to the ELC Art and Craft Centre where art students came to study and the legacy now is a carpet weaving factory, pottery and printing works where the emphasis is on ART. Intersperse this with the rolling plains of Africa where the Paperbark tree, animals and birds abound and the Southern Cross and Milky Way shine down and you have the recipe for an experience that will live with you forever.

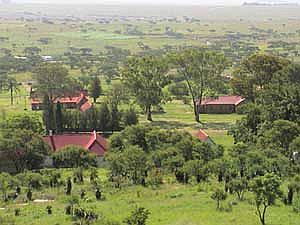
Building as it looks today
For a superior travel experience and accommodation you simply must visit Rorkeĺs Drift Lodge. The Lodge lies nestled against the side of the Sinqindi Mountain and overlooks the battlefields of Rorkeĺs Drift and Isandlwana. Guests are assured of awe-inspiring views that showcase an African landscape in its essence.
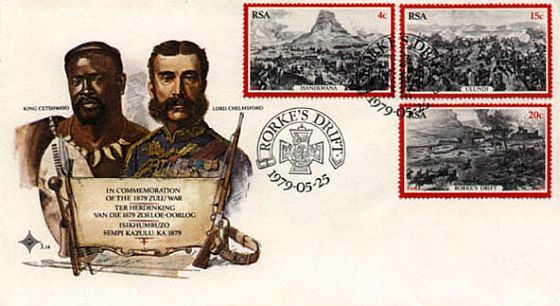
First day cover from May 1979
[Comprehensive bibliography has been omitted - website editor]
Main Lecture presented to the Eastern Cape branch in February 2016
Return to Society's Home page
South African Military History Society / scribe@samilitaryhistory.org